Showing posts with label sewing. Show all posts

Wednesday, January 25, 2012

Bedding and Painting My Ceiling!

I feel like I've been really productive lately as well as keeping up with all of my responsibilities as a wife and mother.  I've been working on redecorating my master bedroom, but I haven't let all the housework slide either.  I'm feeling rather pleased.  I've been anxious to get started on my room for some time.  I finally decided that I was never just going to have a couple days with nothing better to do; if I wanted to redo my room, I was going to have to carve out time.  So,  I've been working on painting and projects during afternoon naptimes.   I still have a lot to do, and can't really reveal too much, but here is a peak at the duvet I've been sewing for the bed.
Photobucket

Photobucket

Photobucket
I just love the mix of colors, patterns and textures.

I've been working on painting the room for the past week.  I still have a ways to go, but I love the changes so far.  (I know most people can probably get a room painted in a couple days tops, but it's taking me a bit longer since I'm really only able to work on it for a couple hours a day, and I didn't get to it at all during the weekend.  I'm just too busy with my family during my hours off work.)
The first thing to go with the current paint job was the ceiling paint.  The entire house was sprayed this caramel beige color before we moved in, including the ceilings.

Photobucket

Photobucket

 I'm not opposed to color on ceilings, but really this is just too dark and dreary, especially in a bedroom.
So, I repainted the ceiling a standard white.  I love having the ceiling white.  It makes the room feel so much larger and airy.  It's so much brighter!

Photobucket
I'm currently working on the walls.  I think they will be finished tomorrow, so expect some pictures in the next couple of days.  I really can't wait to reveal them!  I love the way paint is transforming this room.

Sunday, January 15, 2012

Lined Patchwork Stockings Tutorial

Yup, I'm posting about a Christmas project in January.  I just got so behind in December, that I didn't get my projects posted.  I decided to go ahead and post about these stockings now, rather than wait until November.  If someone wants to make these, they will have an entire year to work on them.  I just barely finished these in time for Christmas.  I think I finished them on the 23rd, just in time to hang them above the fireplace for the big guy.   I love the bright colors: vibrant red and limey green. I also love the elfish curled toes. They really just make me smile.  I also love that they are all slightly different.  Each has the same 4 fabrics, just a different patchwork combo, and/or a different cuff fabric.  They match, and yet they don't.  Its totally me.
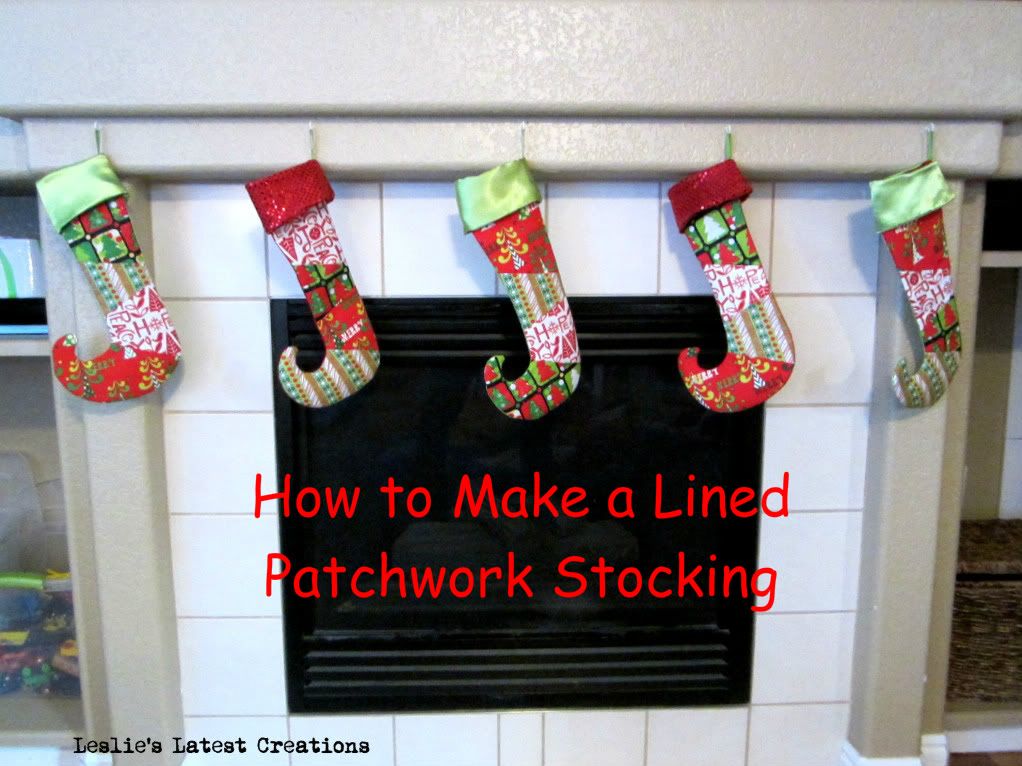
Photobucket


Want to make your own?
Supplies Needed:
3-5 different fabrics, depending on how many pieces for want.  To make 5 stockings, (plus a little extra in case I need to make another in a few years) I needed about 1/4 yard of each.
Cuff fabric- I used green satin and red sequins, but I needed about 1/2 total for all of the stockings.
Backing: I backed mine with red satin.  I used about 1 yard and it was plenty.
Fusible Fleece
Lining Fabric
Ribbon

1. First, draw your desired stocking shape.  I made mine on the smaller side, since Santa has a stocking budget at our house.  These are just big enough to fit a clementine orange, some candy and a few lego guys and matchbox cars.
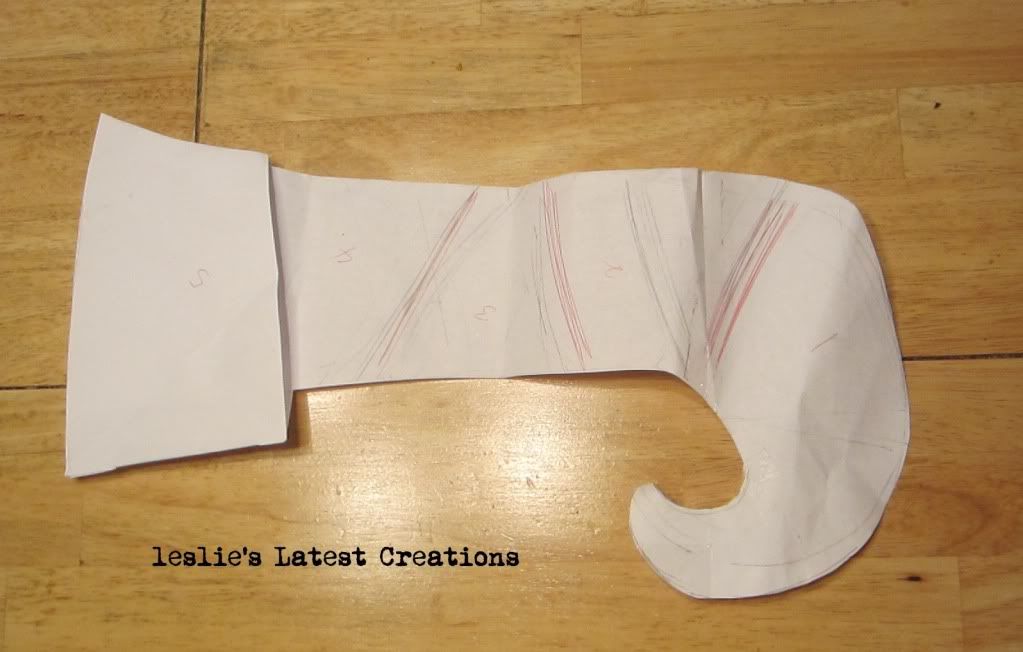
Photobucket
2. After drawing the sock, cut it into the desired patchwork pieces.
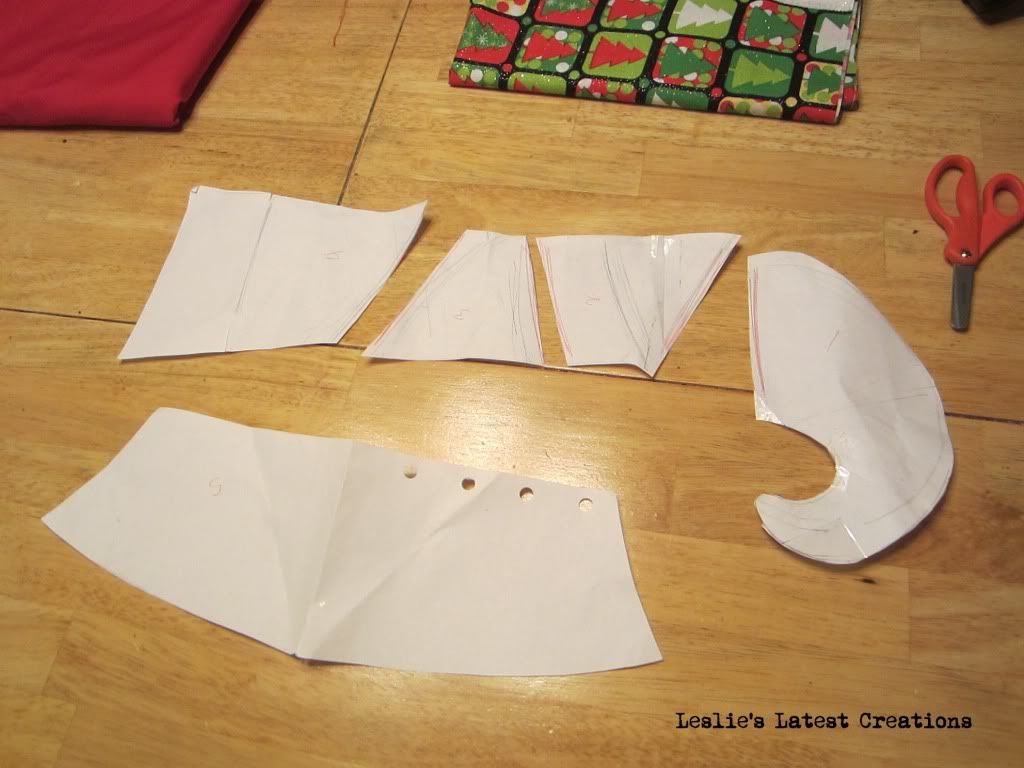
Photobucket
3. Pick coordinating fabrics and cut them out with the patterns you just created.
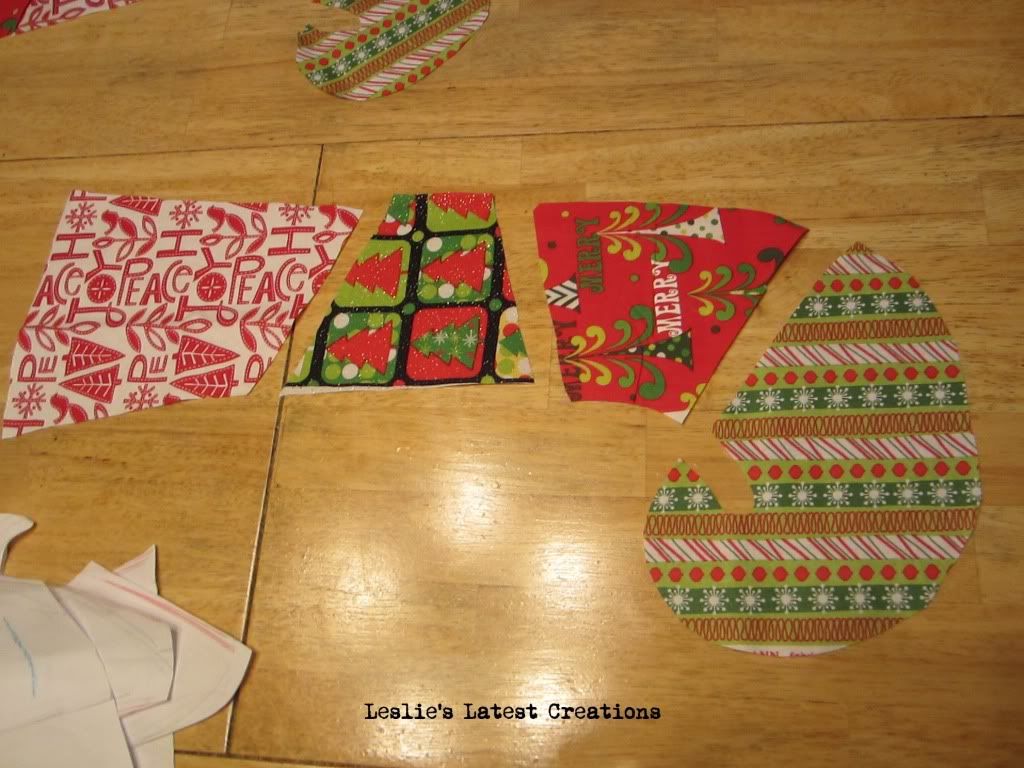
Photobucket
 4. Sew them together, using a 1/4inch seam. Press flat.
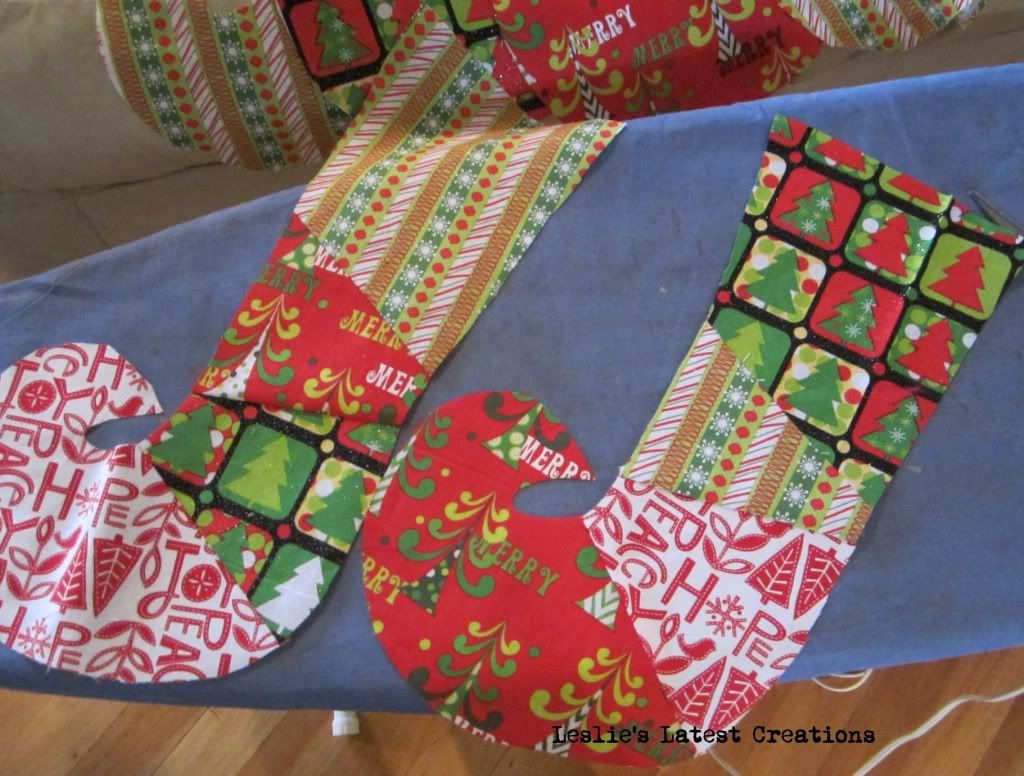
Photobucket
5.  Next cut the fusible fleece to the shape of the sock, and iron it to the wrong side.
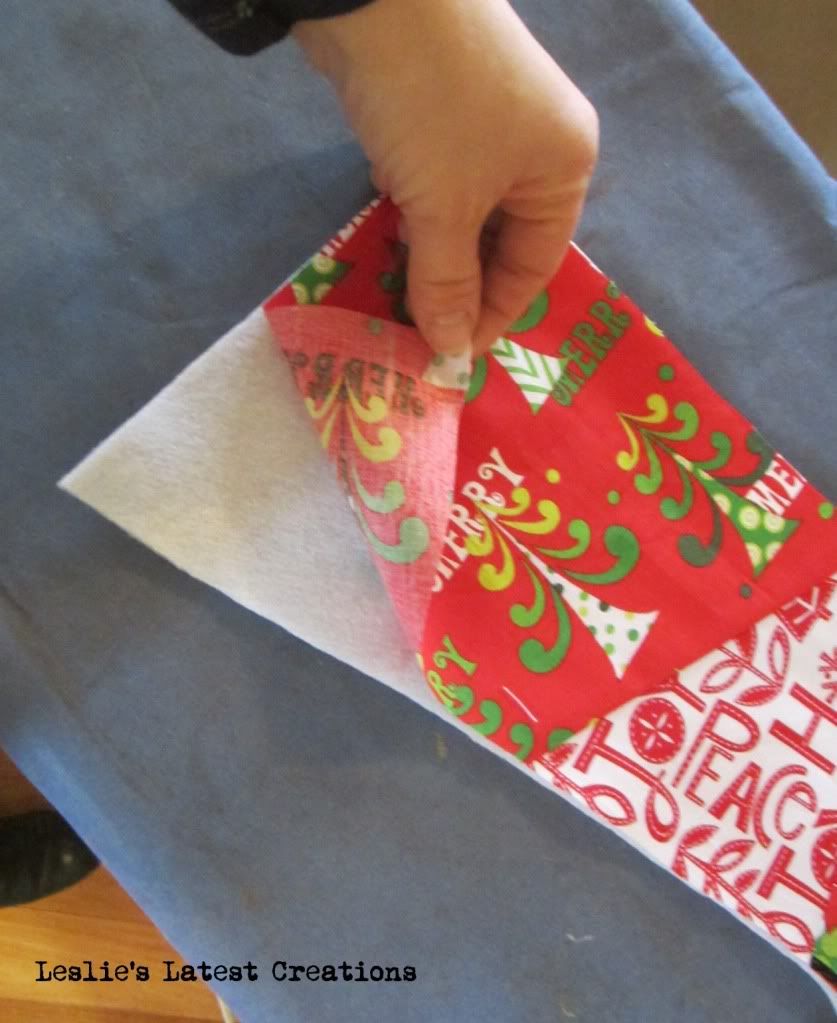
Photobucket
6. Lay the sock face onto the backing fabric and cut out the back of the stocking.  With right sides together, sew the patchwork face and the backing together with a 1/4in seam.
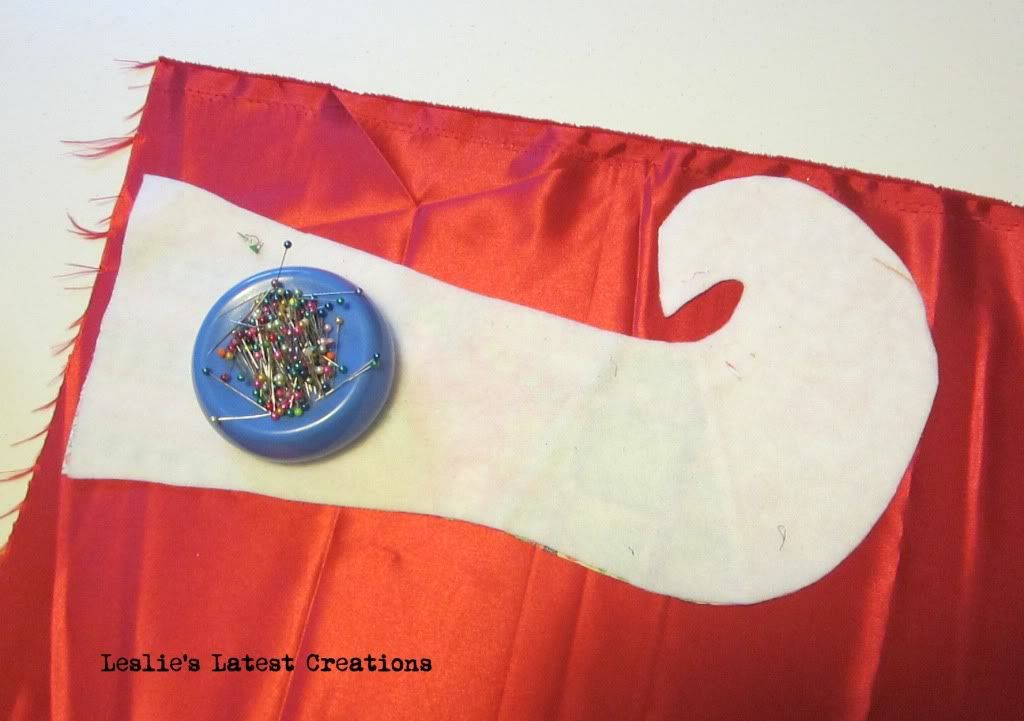
Photobucket
7. Trim the edges.
Photobucket
and clip the corners.  This is a crucial step if you want the fabric to lay flat after you turn it right-side out, which you should do now.  Press.
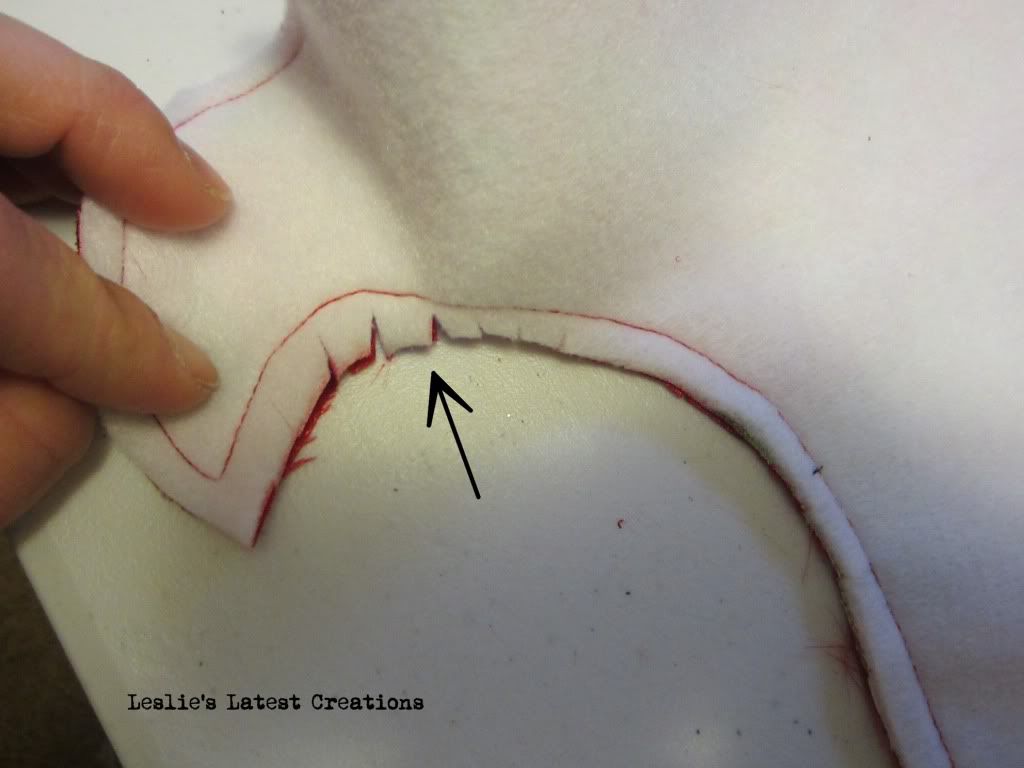
Photobucket
8.  Now, onto the lining. Cut out 2 sock pieces from the lining fabric.  The sides are the same, but I modified the toe shape a little on the lining since it won't be seen.
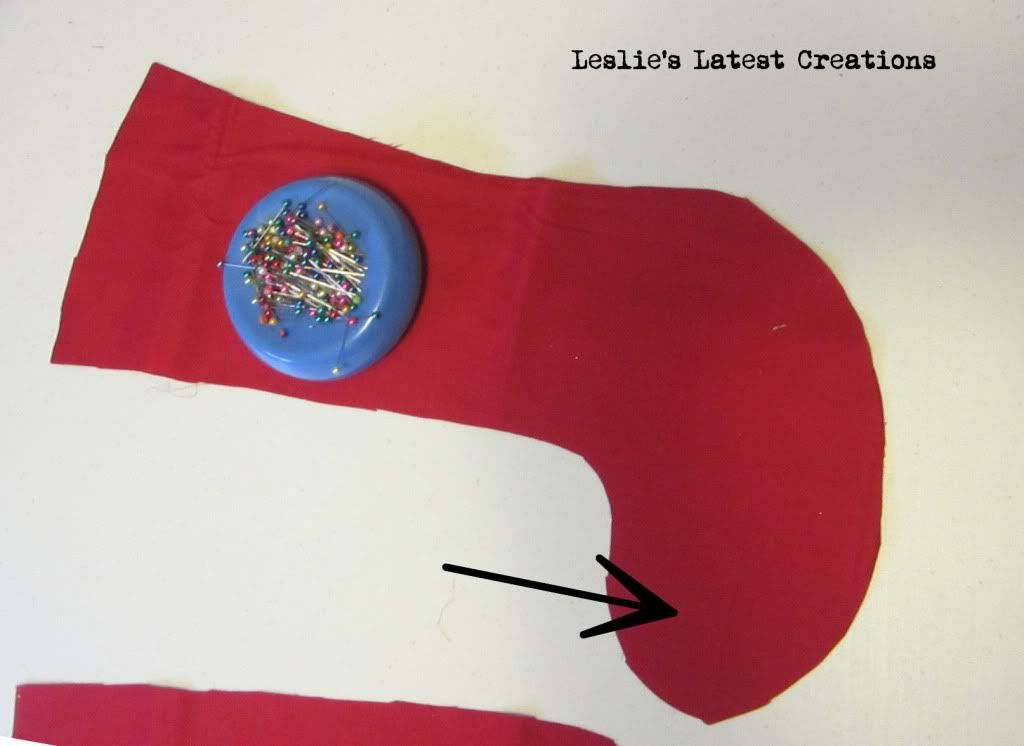
Photobucket
9. Sew the lining pieces together but don't turn it right side out. Leave it as is.  Now, stuff the lining with the wrong-sides out, into the stocking.  The seamed edges of the stocking should be touching the seamed edges of the lining.  This makes the inside of the sock nice and smooth with no fabric edges. You shouldn't feel any of the seamed edges when you put your hand into the stocking.
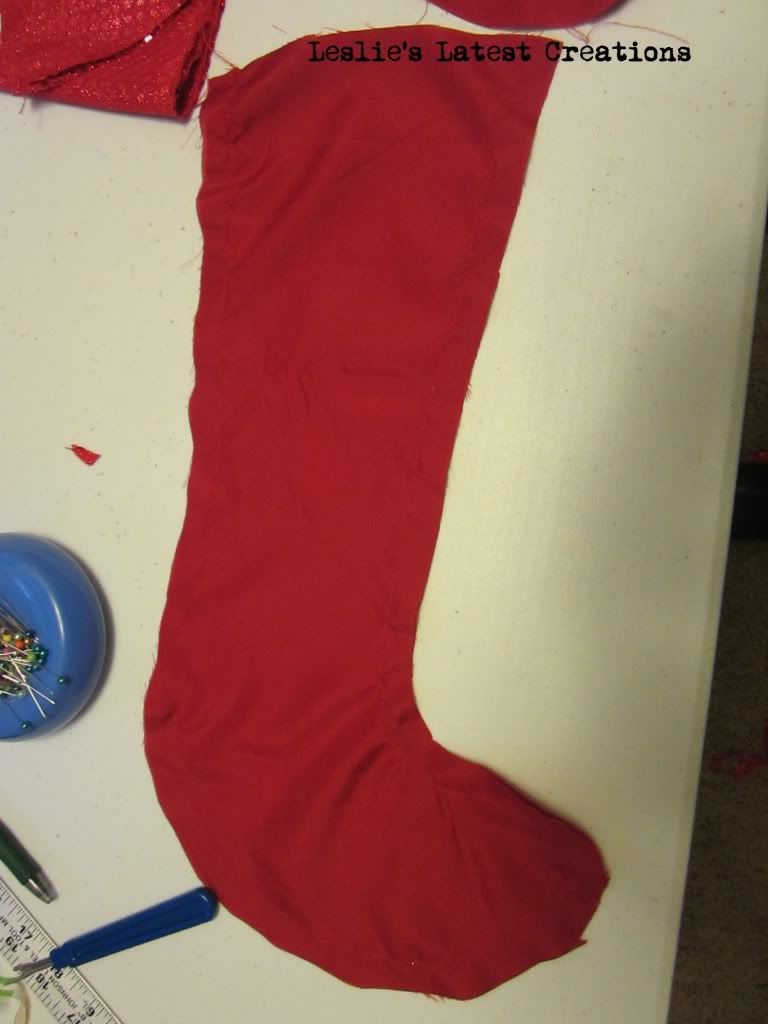
Photobucket
10.  For the cuff,  cut out 2 pieces of fabric.  One will be the cuff and the other will be the cuff facing.
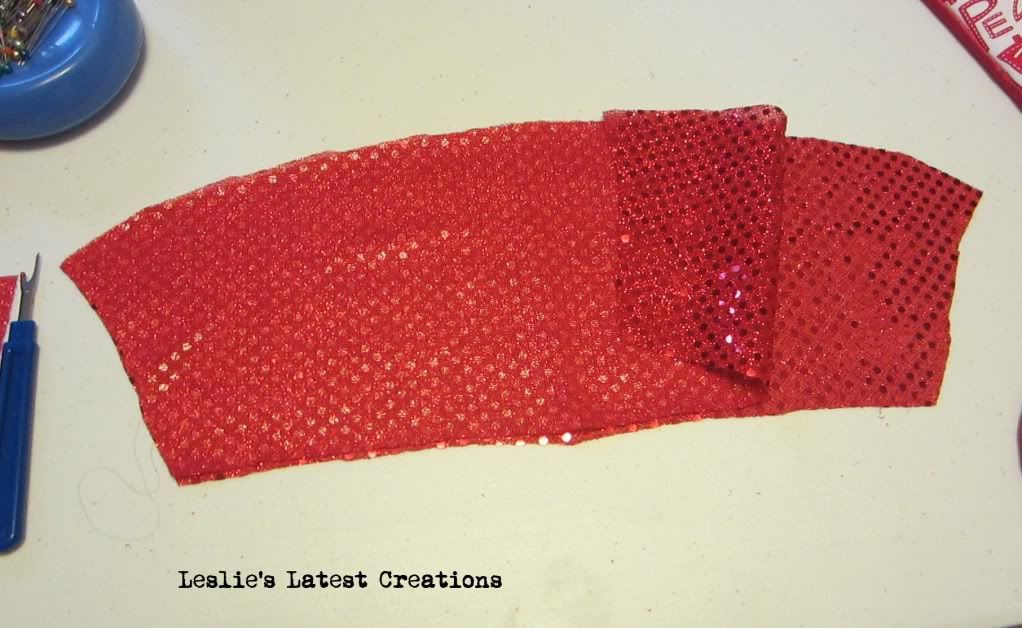
Photobucket
11.  Fold each in half,  right sides together and sew together.  You should have 2  "tubes"
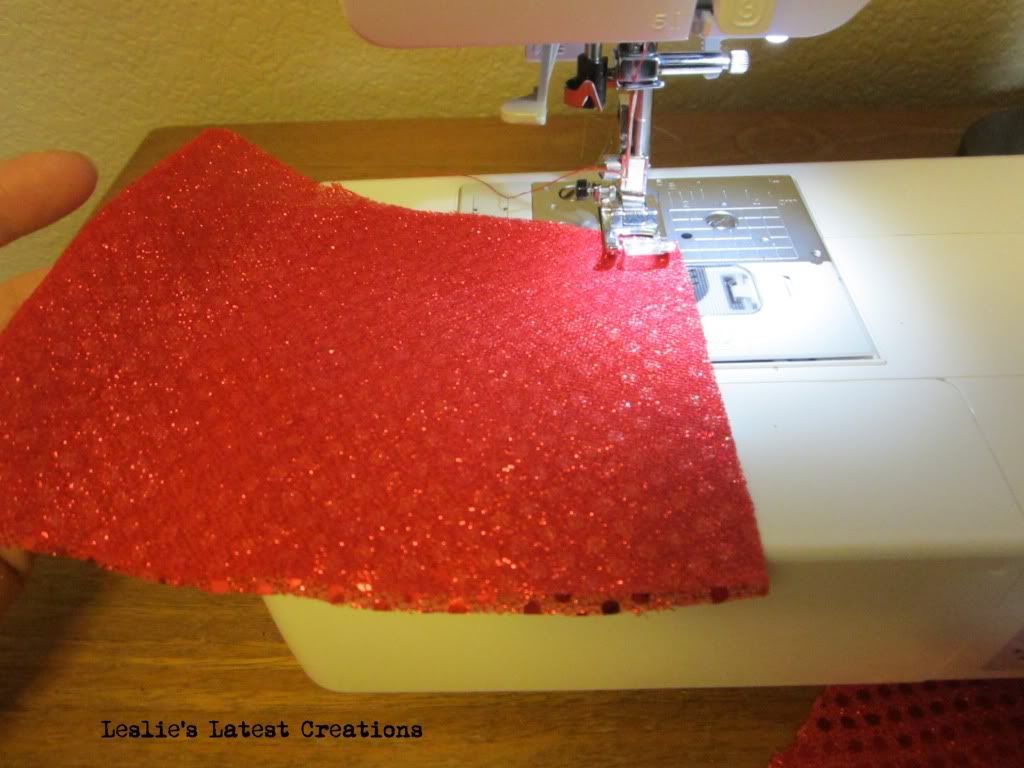
Photobucket
12.  Turn one right side out and slip it into the other piece.
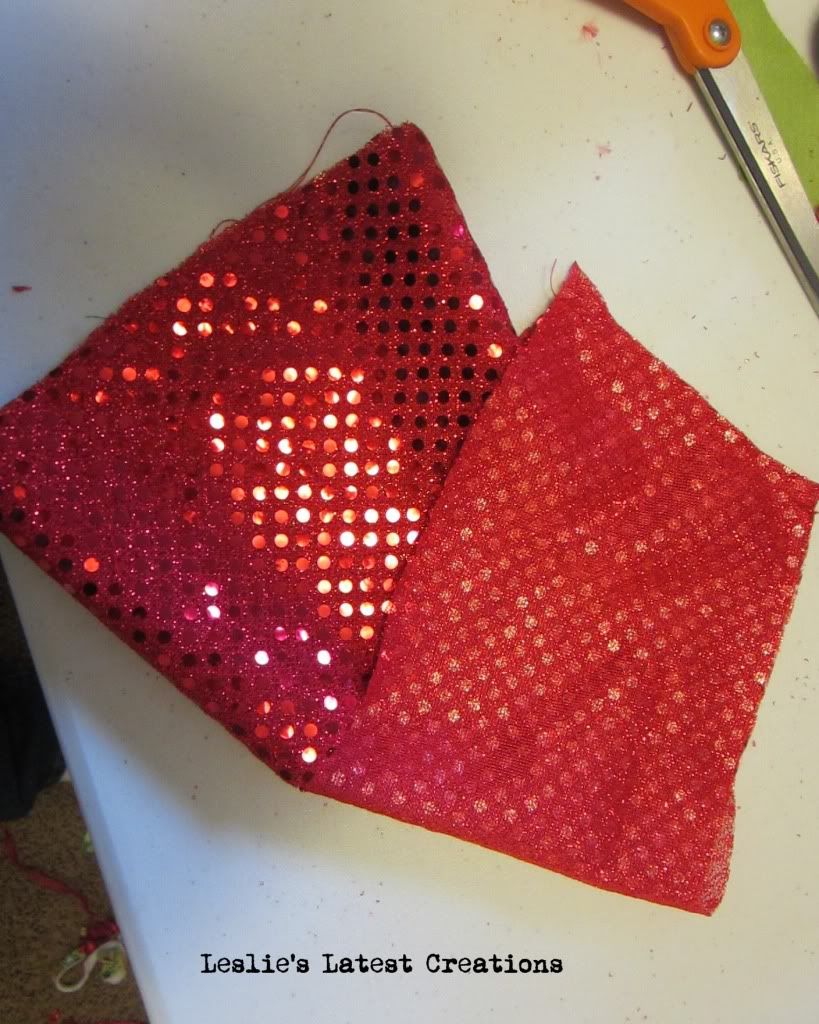
Photobucket
13.  You should end up with the 2 pieces right sides together.  Sew the tubes on 1 side.  This will be the bottom of the cuff.
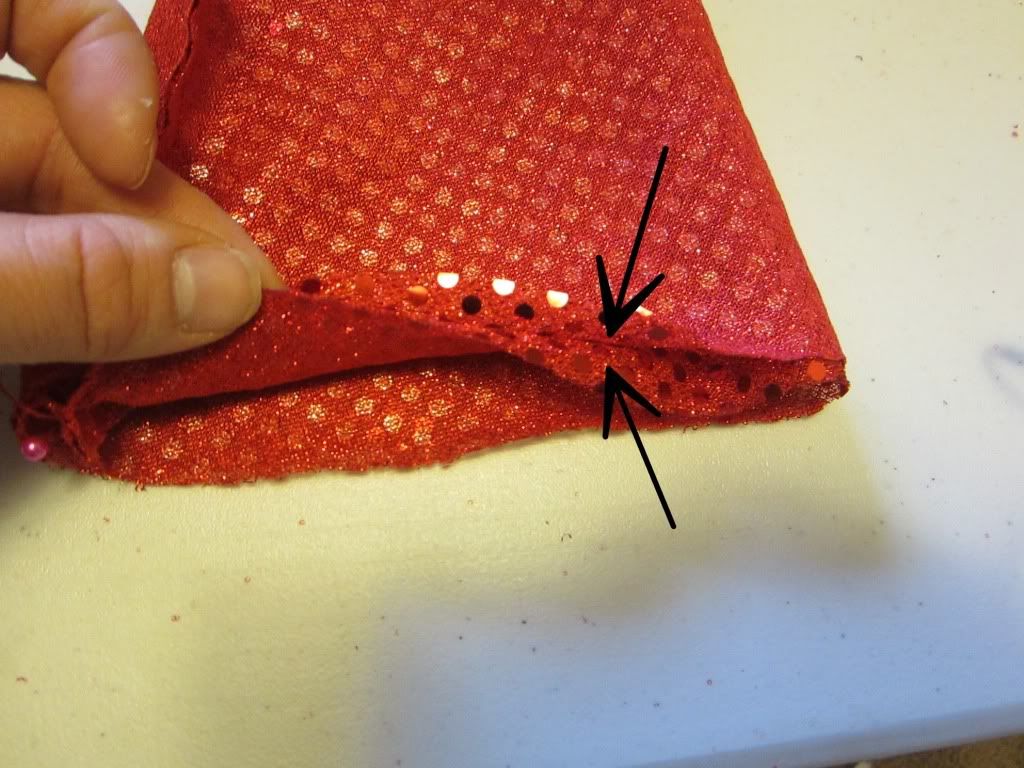
Photobucket
14.  Turn it right side out.  You should still have a tube, but the outsides and the insides should be the right side of the fabric now.  For me, this means that the sequins are now showing.  What will be the bottom of the cuff now has a nice finished edge.
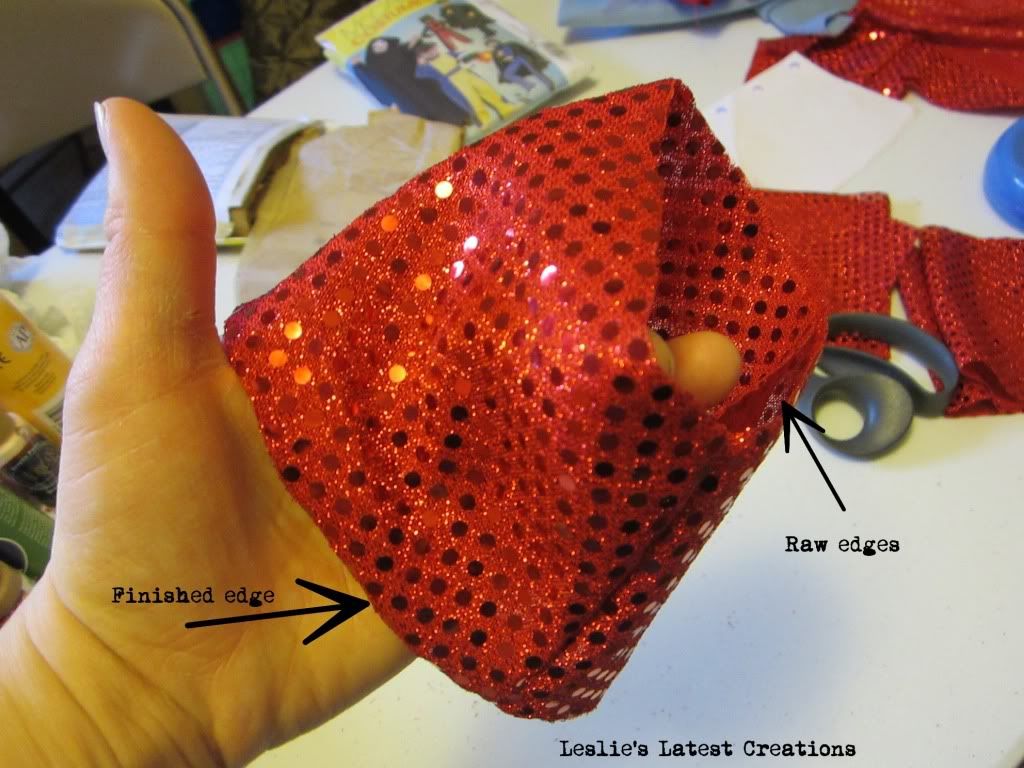
Photobucket
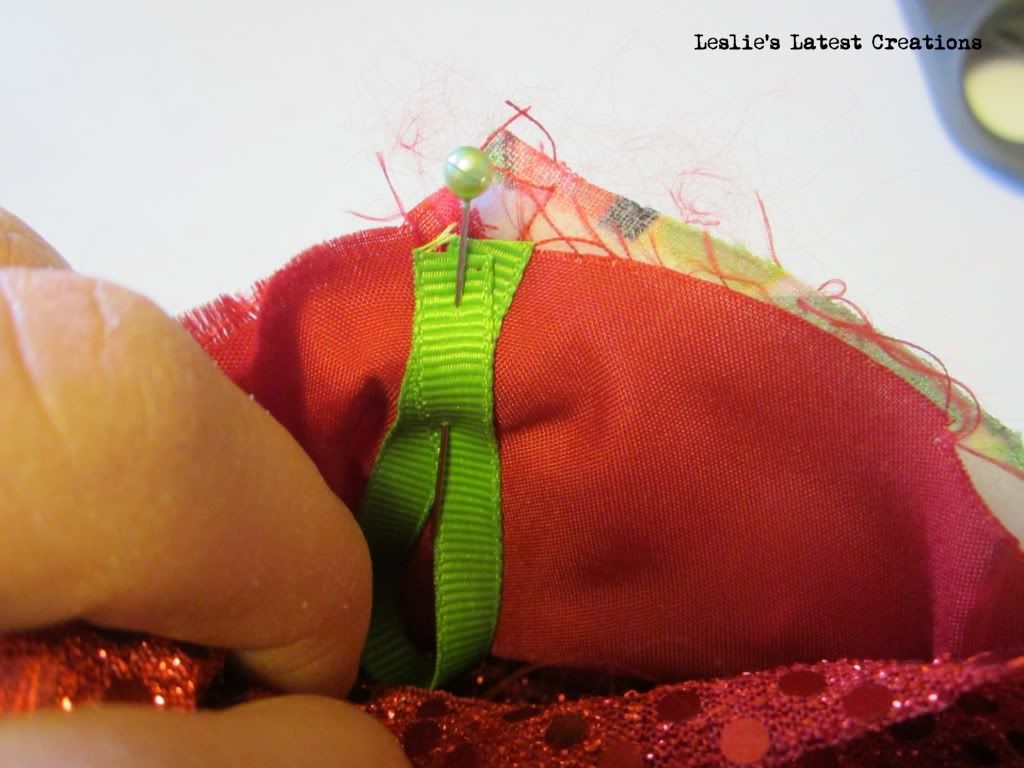
15.  Its almost time to sew the cuff to the stocking, but first cut a small length of ribbon, form a loop and pin it to the edge of the stocking, loop side down.
Photobucket
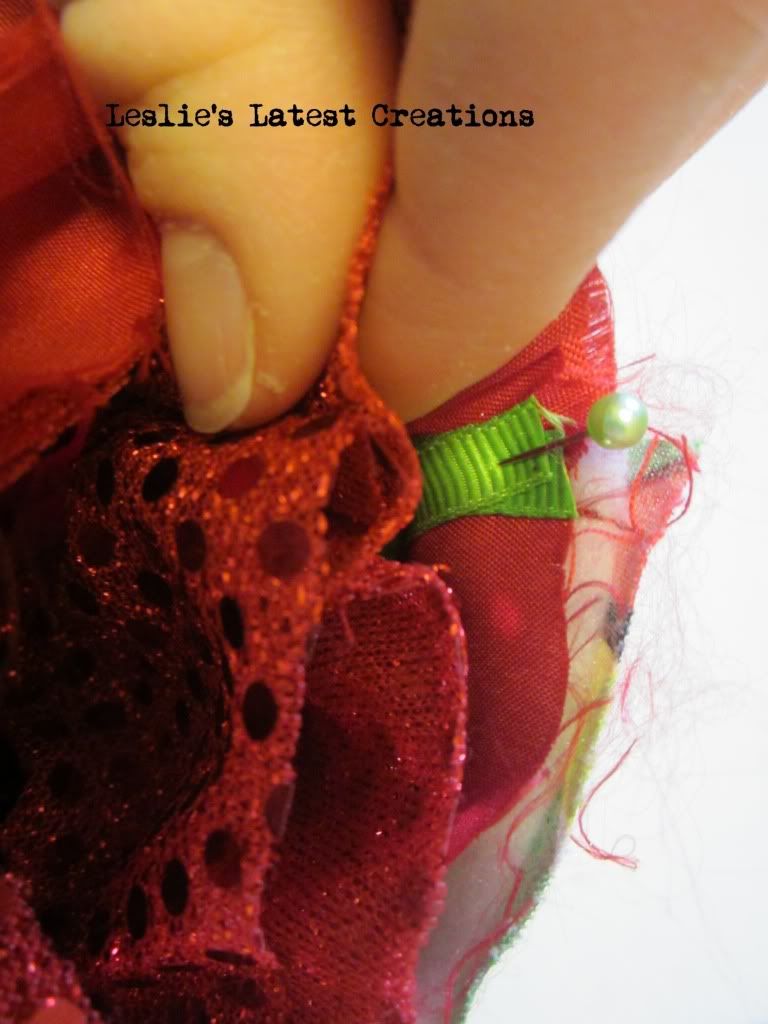
16. Now, slip the cuff into the stocking, with the finished edges on the bottom and the raw edges matching the raw edges of the sock.
Photobucket
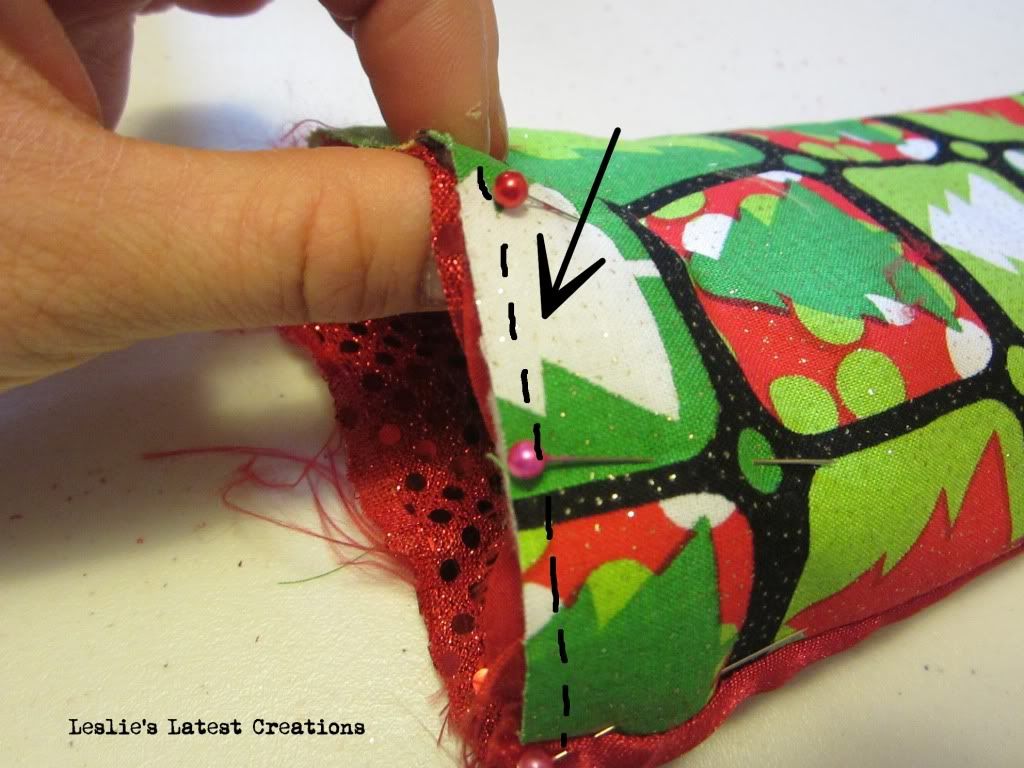
17.  Pin in place and carefully sew the cuff to the sock.
Photobucket
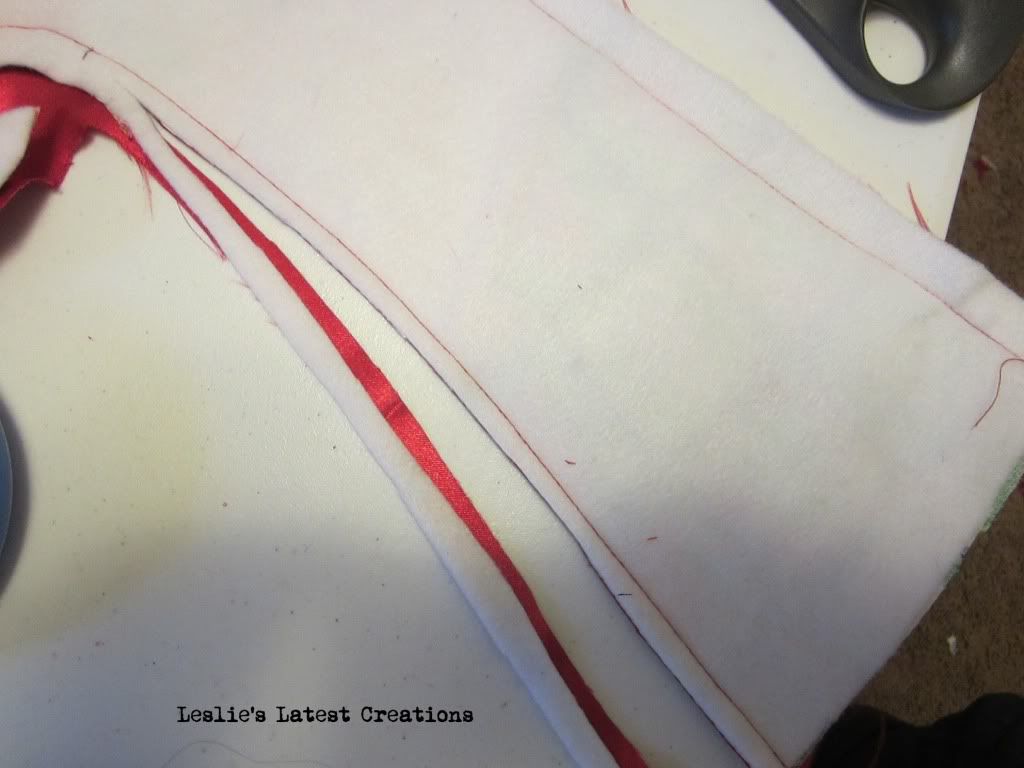
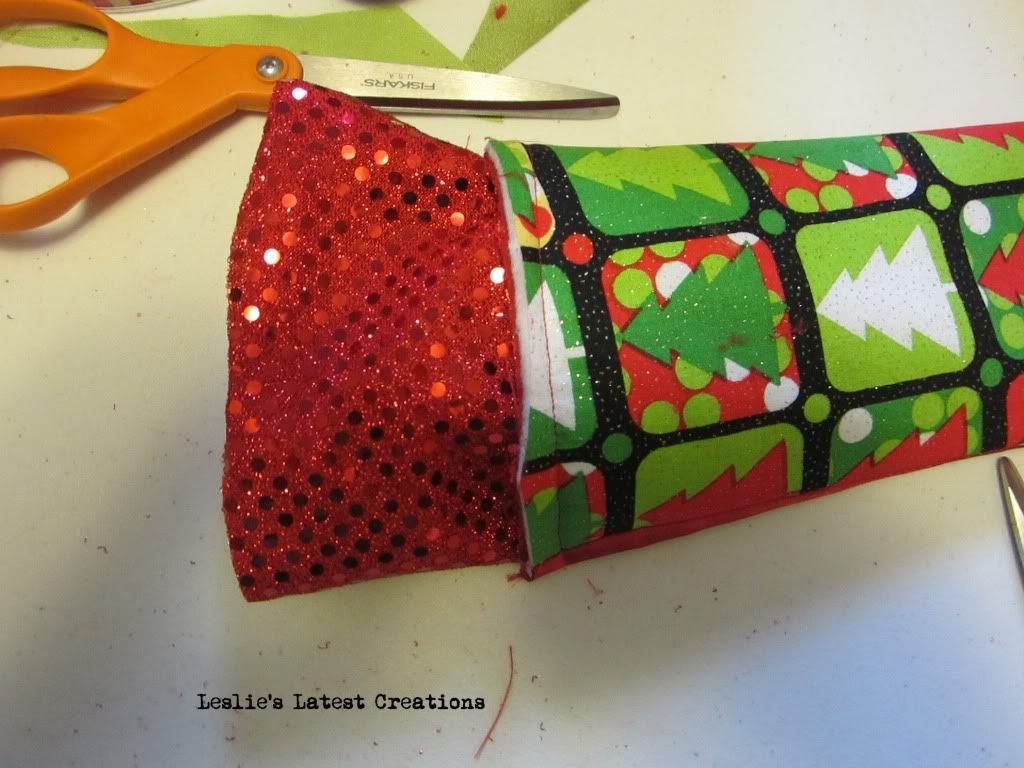
18. When you pull of the cuff, it should look like this.
Photobucket
19. Fold down the cuff, and you are done!!!
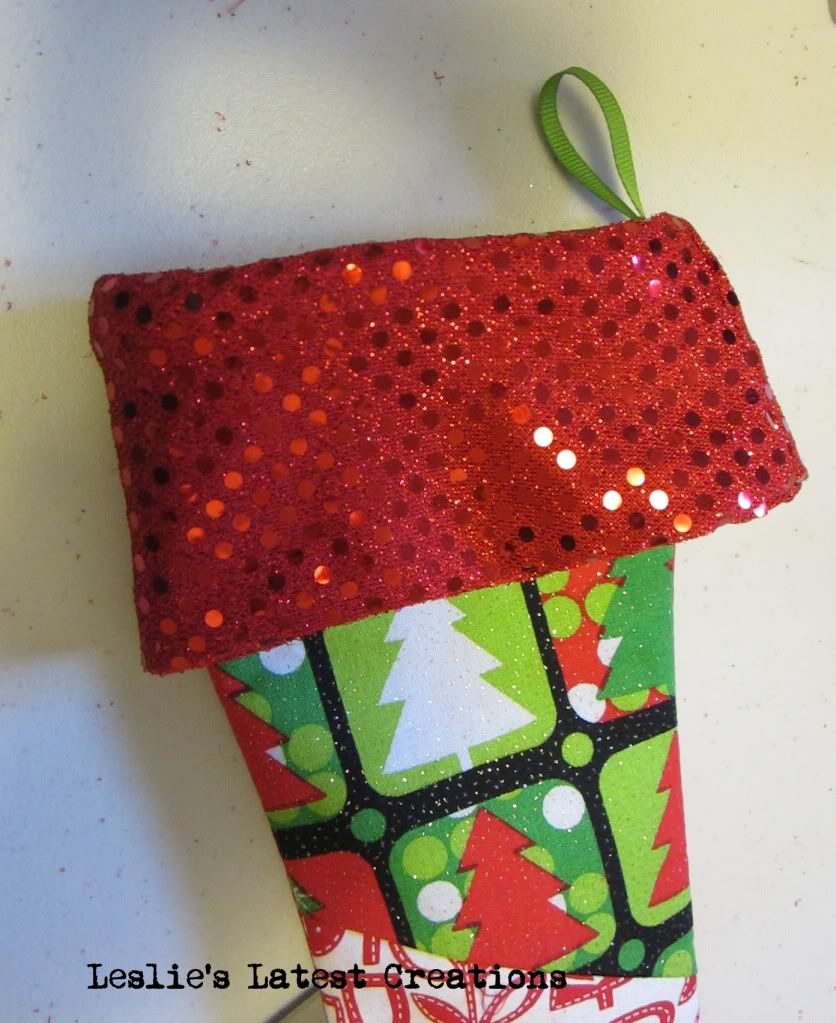
Photobucket
You now have your very own elf shaped, lined, patchwork stockings.
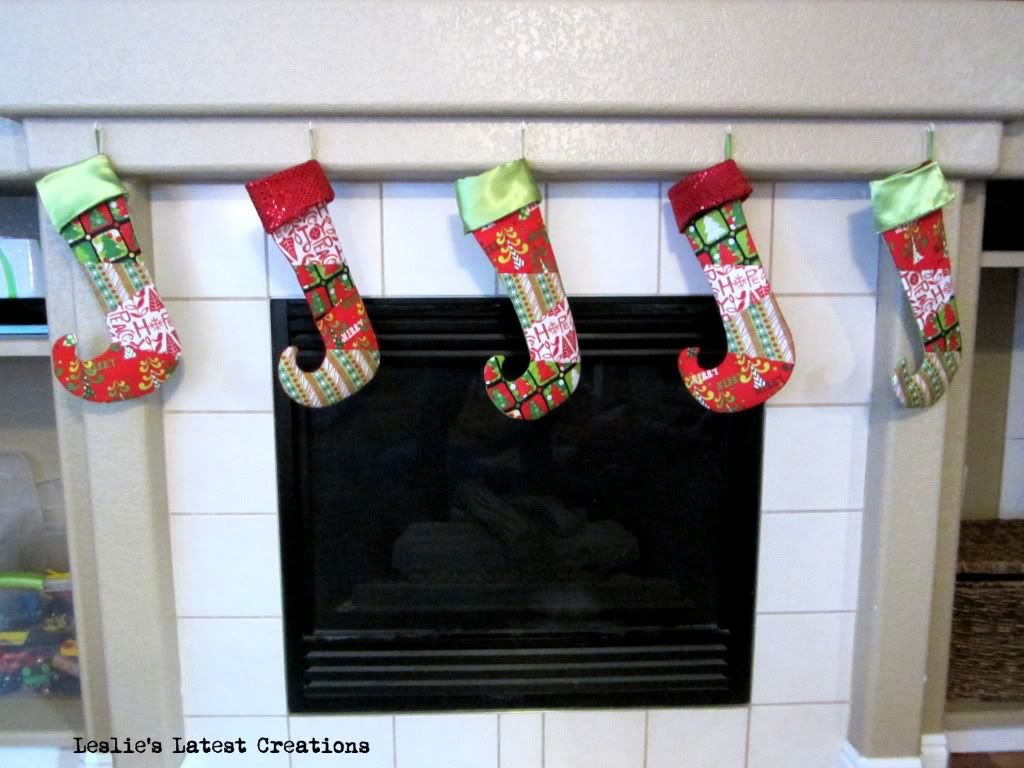
Photobucket

I will be linking up to THESE Fabulous Parties

Friday, January 13, 2012

FINISH IT Fridays: BYU Wall Quilt

When it comes to my craft room, most of the time, it looks like a hurricane tore through it.  Part of the problem comes from me not putting things away when I am finished, and the other part happens because there is nowhere for me to put these items away.  My closet is stuffed to the brim with fabric and half finished projects and supplies.  I have an ADD tendency when it comes to projects.  I get really excited to make something, purchase the items needed, maybe get started on it, and then I never get back to it.  Or, I might get back to it months later.   I also loves to browse the clearance racks for deals.  I have lots of impulse craft purchases.  I might buy something that it such a great deal that really, how could I pass it up, when I don't have any clear idea of a purpose or a deadline.  Thus, my craft room is a bit cluttered and stuffed.
To help with this problem, one thing I want to work on this year is finishing up these partially completed projects (I will also be sorting and tossing items I no longer need as well as organizing my space).  To give myself an incentive, I have decided that I will work on projects as part of blog series: FINISH IT Fridays.   I will post at least one Friday a month, possibly more but with no firm schedule, a project that I have finally finished.  It will be something that I have just for some reason not completed.    I will complete the project and post the finished product.
Photobucket
For this Friday, I finished a wall quilt.  Back when I first started this blog, I was just finishing some monthly wall hanging quilts.  I have a spot in my kitchen where I change them out monthly.  I only made 11,  with the idea that June and August could share a Summer themed quilt.

My September quilt has a back to school theme.

This is great in theory.  However, our school district has the kids going back to school the first week of August.  It just doesn't make sense to put out the "Back to School" quilt in September when the kids have already been back to school for an entire month.  So, last year, I hung up the Back to School September quilt in August, instead of reusing my June quilt.  Hence, I didn't have a quilt for September anymore.  Even though school starts here in August, football still starts in September, and with a house full of boys, football season is very well loved here.  I decided to make a football quilt for September, and I couldn't resist using our favorite team.
I got started on this back in August, but somehow I just didn't get it done before the end of September.  Then, since my deadline was passed, its been sitting on a shelf in my craft room, waiting for me to finish it.  I decided that today would be that day and now, I will have something new to enjoy this September.

I will be linking up to these Fabulous Parties All week long.

Monday, October 24, 2011

Toddler Tees

One of my nieces recently had her first bday.  I couldn't resist making her a couple of embellished shirts.

Photobucket
I purchased 2 of these light purplr shirts, and then proceeded to cut one of them into strips.  I ruffled the strips, then sewed them on.  I used the same design here as I did for my Watermelon Pink Tee.
Photobucket

Photobucket
I think it's cute and if I were a 1 year old, I would wear it!
The second shirt is actually more like a light cardigan. 
Photobucket
I made a few little rosettes from some scrap yellow and gray knits.  I sewed them onto the left side.
Photobucket

Photobucket
I think this one is fun because its a grownup color scheme on a little toddler!
I think she looks cute.
Photobucket

I frequently participate in THESE parties.

Wednesday, October 19, 2011

Lime Green Car Seat Canopy

So,  I couldn't resist sewing my sister a carseat canopy (another great invention that didn't exist when I had my babies!)  Her stroller/car seat is black, silver and lime green.  So, I picked out fabric to match the carseat.  
Photobucket
My mom with the baby in the carseat.  You can see a little bit of the canopy.
Here is a good look at the canopy.  However, the carseat that is serving as the model is actually mine and navy blue.  Doesn't quite match.  I live in a different state than my sister, so the only pic I have of her carseat with the canopy is the one above.   So, here are some photos I took before I gave it away.
Photobucket
I really love the fabric.  It has a fun pattern, so it's cute for a mama to pack around. But since it's green and gray and matches the carseat, it is gender neutral.
Photobucket

Photobucket
I love the way it turned out!  I couldn't resist trying out of the decorative stitches on my new sewing machine.


For instructions on making your own: http://just-because-i-am-me.blogspot.com/2010/02/car-seat-canopy-tutorial.html

 I participate in These Parties

Tuesday, October 18, 2011

Elephant Parade Nursing Cover

My sister recently gave birth to a darling little boy.  As part of her shower gift, I sewed her a nursing cover.
Photobucket
Sorry, this is a pic from my phone. 
I just couldn't resist appliqueing a mama-baby elephant set onto it.  It just makes it a little bit more original.
For the covers that I sew, I actually add about 8 inches to the width.  From experience, I've realized that extra width can be nice when its a bit breezy outside.  Nothing like giving a show!
Photobucket
I'm modeling the cover here. Tried to get Mr. Right to model it, but he refused. Lol. 
If you want to make one, there are numerous tutorials already out there.  So,  there is no need for me to add my two cents. Here are a few I like:
http://sewmuchado.blogspot.com/2009/02/description-stylish-and-practical.html
http://littlebirdiesecrets.blogspot.com/2008/07/how-to-make-nursing-cover.html
http://madebythemamamonster.blogspot.com/2008/04/nursing-cover-tutorial.html

I love giving these away at babyshowers!  They weren't around when Anakin was born, but I received one  when I had Buzz, and it was a lifesaver.

I participate in these Parties.  Head over and check them out.

Friday, October 14, 2011

Friday Fashions # 23, Striped Circle Skirt

I've had my eye on this skirt since July, when Jen posted the tutorial for the Ice Cream Social Skirt on icandy handmade.  This skirt was actually my first pin on pinterest!


Today I decided to sew my own.

Photobucket
I think with my fabric choice of green and blue stripes, my skirt looks like it belongs in an academic setting, rather than an ice cream parlor, but I love it!
Photobucket

Photobucket
This was such a fun, fast skirt to sew up.   I hope I can find another striped knit to make another.

I am participating in these Parties this week.

Friday, October 7, 2011

Friday Fashions #22, Green Knotted Dress

This week, I tackled a dress for my sewing project.
Photobucket
Remember my Knotted Paisley Shirt?
I have loved it!  I wear it all the time.  When I sewed it, I remember thinking that this style would make a really cute dress if it were lengthened.  Well,  I saw this pattern a couple months ago, so I snagged it when patterns went on sale for $0.99 apiece.
Photobucket
Photobucket
It is basically the same pattern as my shirt, only with the length and shaping over the hips for a knee length dress. It has darts in the back to give it some shaping at the waist, which my tshirt patterns doesn't have. The front still has that awesome knot.  And, it was totally worth $1 to have the pattern instead of having to draft my own!
The next week while browsing fabric for a different project, I came across this beautiful green and brown knit.  I love this color combo, and at only $3.98/yd, I snatched it up.
Photobucket
Today, I decided to pull out the pattern and the knit and get to work.

This dress sews up really fast. Because it is a knit dress, there isn't a zipper; it pulls over the head. So, I think even a beginning seamstress could probably sew this if she reads and follows the pattern's directions.
I can't wait to wear this dress to church on Sunday.

Photobucket

Photobucket
The awesome knot on the bodice!
Photobucket

Photobucket

Photobucket

LinkWithin

Related Posts Plugin for WordPress, Blogger...