Showing posts with label Burlap. Show all posts

Tuesday, September 13, 2011

Burlap Signs

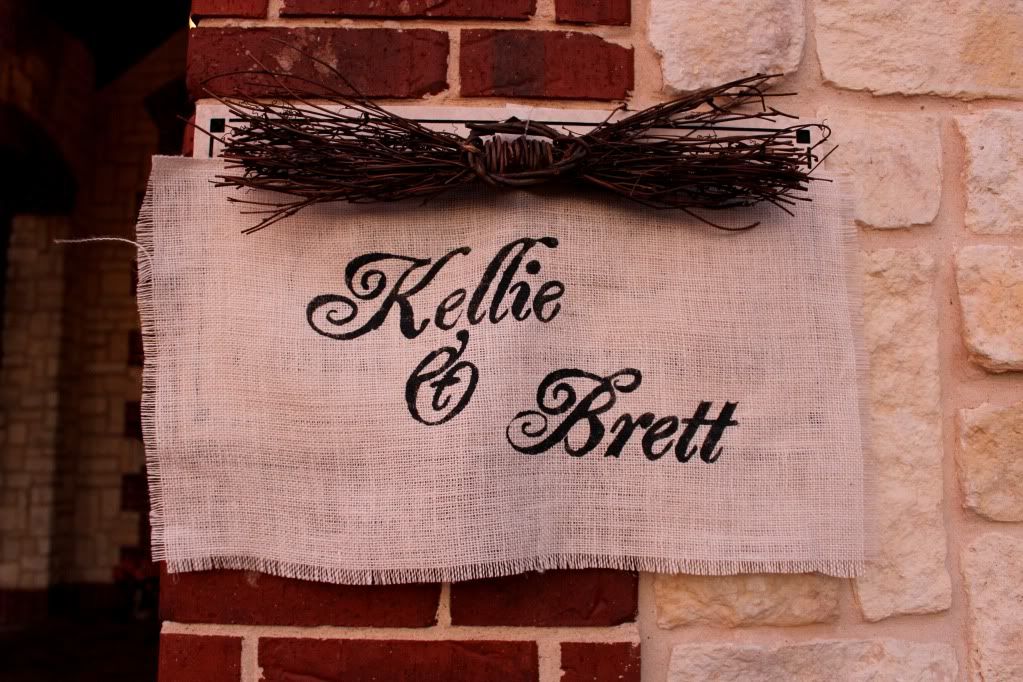
My sister's wedding reception was held in a local clubhouse. The setting was gorgeous, but there were a few unsightly plaques on the outside doors stating things like the clubhouse hours which didn't really set the right mood.  So, we wanted to cover them up. Kellie's theme was garden party, and we had burlap a plenty.  I used some of it to make signs to hang in front of the plaques.  
I think the signs ended up looking gorgeous.  I made 4 signs with freezer paper stencils, burlap and grapevine branches.  If you have a cutting machine, it would be super simple to make the stencils.  I don't, so I made them by hand by tracing the design onto the freezer paper and then cutting it out with scissors.   I stenciled "Kellie and Brett", "Together Forever" and a monogram that my sister created for the signs at the front door.  Then I attached a grapevine branch to the top and hung them in front of the plaque. 
Photobucket

Photobucket

Photobucket

My sister created a candy bar for the party favors, so I made a "Thank You" sign to hang above the candy.
Photobucket

These little signs added such a cute decorative touch.  Kellie plans of displaying the signs by framing them in funky colorful frames to put in her new home.

I've linked up to: Today's Creative Blog and House of Hepworths

Sunday, May 15, 2011

Burlap Flower Pots

At the same Relief Society Activity that I made the lemon curd tarts, Helen, one of the other women in the planning committee, made these gorgeous table centerpieces.  She planted these cute spring flowers in basic terra cotta pots. Then she simply wrapped them in burlap.   I think the burlap adds such a charming cottage garden feel.  Love it!

Thursday, February 10, 2011

Be Mine Banner


 I saw the most fantastic banner over at Crap I've Made a couple weeks ago that is the inspiration for my banner.    Char has a great tutorial!  I've made mine a little different, mostly cause I'm lazy (also cause I love burlap and wanted to use it!).   Here are my lazy, copycat instructions.
Supplies needed: Freezer paper, Tulip Fabric Paint, ribbon, natural and red burlap, cotton fabrics about 1/4yd each.
First, I made a heart template.
 Then I cut out 6 hearts in the natural burlap.  I cut mine on the bias, because I like the idea of the burlap fraying a bit over time.

Next I made stencils for the letters. Using my hearts as a size guide, I drew my letters onto Freezer paper.  After that, I had to cut out each letter. This step was by far the most time consuming.  If I had a Silhouette, this step would be a cinch!


I ironed the freezer paper onto the hearts, plastic/waxy side down.  All over blogland, I have seen people using freezer paper as stencils.  This was my first venture.  It is awesome!  I have to admit, I was a little worried that the paper wouldn't peel off  or that it would leave a sticky residue.  My fears were groundless.  The paper worked like a dream.  Having it ironed onto the fabric hearts kept the stencil from slipping all over the place and paint only went were it was supposed to.  I will definitely be using freezer paper stencils again!  I let Anakin and Buzz stencil away, using the tulip fabric paint and sponge brushes.  They love to be included in craft time. 


 After they were done painting, I peeled off the paper and let the paint dry.  It can take up to 4 hours.

Meanwhile, I cut out my cotton fabrics.  Based on the size of my hearts, I ended up making 7.5in squares.  I had 2 prints, so I cut out 3 squares from each fabric. I ran a bead of fray check along all of the edges. Then, I cut out six 9"x9 squares from the red burlap. 


Next, I sewed the hearts on the cotton prints and the prints onto the red burlap.   I didn't turn the edges under on the cotton, just a plain straight stitch.  Hence, the need for the fray check in the previous step. 

After that, I cut 2 slits near the top of each square so I could thread my ribbon through.  Now, just a hint of the ribbon peeks through between each letter. 


I ended up making a heart to sew between the B and the M squares to separate the words.  I just freehanded the hearts and sewed the layers together.  Then, I sewed the sides of the heart to the squares. 
Finished!  Now I have a great little banner for February. 

Thursday, December 9, 2010

Give Thanks Banner

This was a super cute, fast banner to make. After my Trick O Treat banner fiasco, I wanted to make a cute banner for Thanksgiving that didn't take multiple nap times to make. I created this in one evening! First, I traced my letters onto Heat N Bond, then ironned them onto brown felt and cut out. Second, I cut out squares of natural and orange burlap that I sewed together. I ironned one letter onto each burlap square. Then, I attached felt stickers that I found at my local craft store. Next, with an exacto knife, I cut two slits into the top each square so that I could run a length of brown grosgrain ribbon through the banner. Finally, I hung on my mantle to enjoy!

LinkWithin

Related Posts Plugin for WordPress, Blogger...