Showing posts with label embellished tees. Show all posts

Friday, September 16, 2011

Friday Fashions #20, Lime Sherbet Shirt

Photobucket
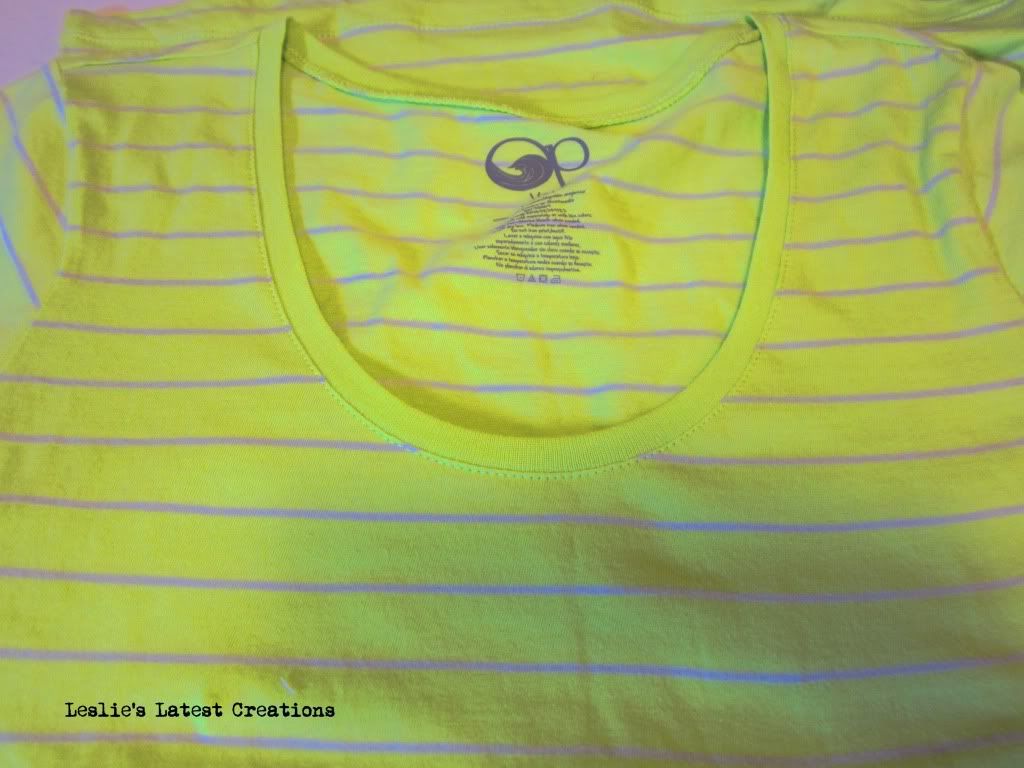
My Lime Sherbet Shirt!

Photobucket
I found this shirt on clearance for today's project. I liked it just the way it was, but I thought that it could look even cuter with a little embellishing.  I really love all shades of green, even lime.  But this shirt was a little bright, even for me.  I felt like the lime totally overpowered the gray stripes.
To play up the gray stripes, I decided to add coordinating gray ruffles to my shirt.  I found these fabrics in my bin of scraps from previous projects.  I cut a few strips out, and started to play.
Photobucket
None of my scraps were knits, so I had to decide how I wanted to finish the edges. I decided to make some ruffles with fraying edges. I zigzagged the edges of the strips to keep the fabrics from completely unraveling, but still allow for some fraying.
Photobucket
Then, I made a long gathering stitch down the strips and ruffled the fabric. I placed the ruffles near the neckline.
Photobucket
I decided I needed another longer strip of the black/gray/lime cotton to go all the way around the neckline.
Photobucket
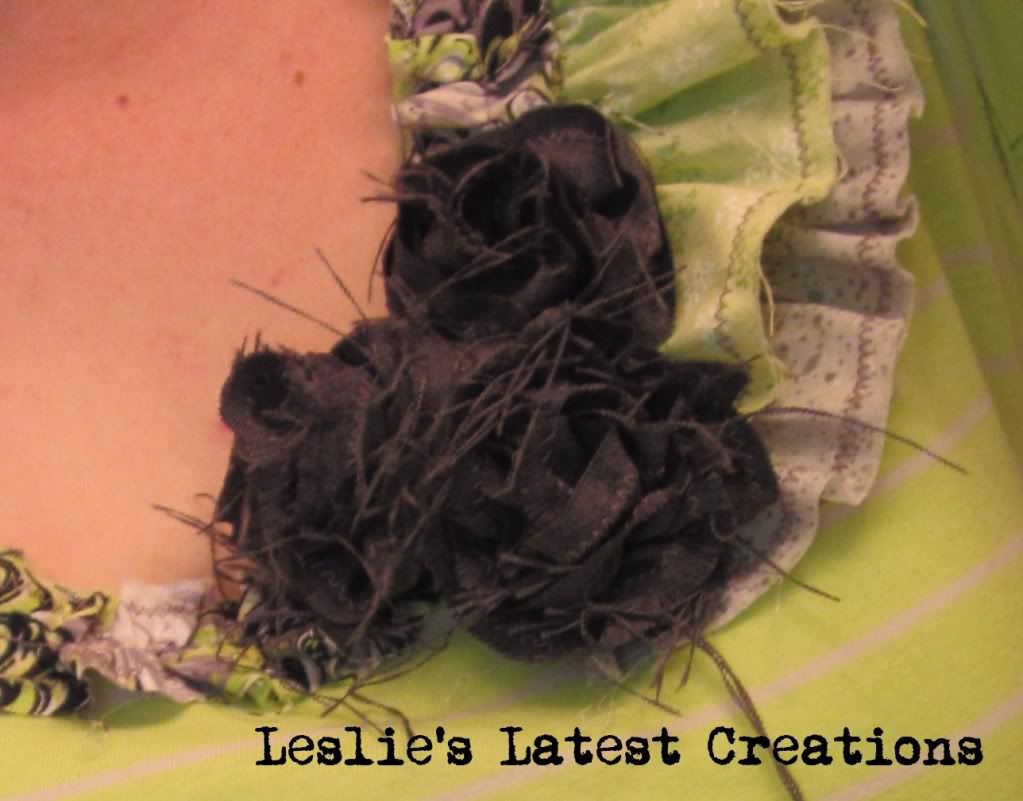
After sewing the ruffles in place, the shirt was cute, but it needed a finishing touch. I decided to add gray rosettes to the neckline at the point were the larger ruffles stop.
Photobucket
I made the gray rosettes out of leftover gray suiting fabric from some trousers I had sewn for Anakin.   I will be posting a separate tutorial on the flowers soon.
Photobucket
I sewed pins to the backs of the flowers so that they can be removed when I need to launder the shirt. I zigzagged the edges to protect from too much fraying, but I still didn't want to risk completely ruining the flowers in the wash.
Photobucket
I love the messiness and imperfection of the flowers.
Photobucket

And, my shirt is complete!
Photobucket
Photobucket

Photobucket
I feel just a little silly trying to have a photoshoot of myself in the mirror!
Photobucket

Photobucket

These are the Linky Parties I participate in.

Wednesday, September 14, 2011

The Irene Tee

The Irene Tee

Last week I had another SIL have a birthday.  She didn't really want HOME or any other word I could make, but she does like the embellished tees I have sewn, so that's what I made for her.   She wears lots of black, with some white and gray mixed in, so I wasn't really surprised when she requested that her shirt be in those colors.  I, however, wasn't really in the mood to make an embellished tee with a black shirt and black ruffles.  The idea felt too boring, and I was afraid any cute ruffles would simply be lost in such a dark shirt. So, I decided to mix neutrals to add some color contrast and yet still keep things in my SIL's preferred color combo.   I purchased this gray tee to start. 
 Then, I took some black lace and cut and pinned strips in a circular "hurricane" pattern. Hence, the name for the shirt, the most memorable hurricane to date for 2011.
 After sewing on the lace,  I ruffled  1" wide strips of a gray, black and white camouflage print knit.   I wanted the colors in that knit more than the camo pattern, so a thin ruffle was perfect.   Next, I pinned the center of the ruffle to the top edge of the lace, creating a layered effect.
 This is what the shirt looked like after sewing the ruffles on to the top of the lace.  I was happy, but it still needed a finishing touch.  The "eyes" of the hurricanes were just a little plain.
 So, I sewed a small gathered flower out of the knit scraps and some black fabric for each "eye".

 And, the shirt is completed!

Thursday, June 30, 2011

Little Girl Embellished Tees


Remember the green embellished tee that I made my SIL for her birthday?  Her daughter is having a  birthday in the next week.  A few weeks ago I was skyping with my 3 yr old niece and she asked if she could have a shirt just like her mommy's tee for her birthday, only in pink instead of green.   Of course my heart melted at this request and I said yes.  After all, it isn't everyday that I get a chance to make something for a little girl.
 When I was shopping for pink tees, was surprised to see so many that had writing or pictures all over them.  There weren't many options for plain pink.  I found this one at target.  I picked it because I liked the slightly puffed sleeves.
Then, I found a 2 pack of shirts that had a matching pink polka dot and a purple stripe.  I decided to run with that option.  I could add the pink polka dot fabric to the plain pink shirt and I would have the extra purple shirt to play with.
So, I cut this shirt into 1 in strips on the bias. 
Using a basting stitch, I created gathers along the upper edge of each strip.  Then I pinned these ruffles diagonally across the pink shirt.  Super simple.  

I got a little more creative when I started working on this purple and white stripe shirt.  I had some extra purple knit from my organdy ribbon ruffle shirt that I thought I could use. However, when I pulled out those scraps the purples were too different, and they completely clashed. 

I did love the look of the organdy ribbon ruffles though and I just happened to have yellow organdy ribbon.  I have always liked the purple and yellow combo.  Hopefully my niece does too!
 I gathered the ribbon and then pinned the strips to the shirt.
Next I sewed the ribbons into place.    After that, I made 3 flowers out of the remaining ribbon with white button centers to sew onto the collar of the shirt.  
Hopefully she likes the shirts as much as I like them!

Wednesday, March 30, 2011

Green Ruffle Shirt

So, when I asked my SIL Shelley which wooden letter word she would like for her birthday, after some thought, she asked for a "green embellished tee!"  I was quite shocked and quite flattered.   That someone other than myself would like to wear something I have sewn, makes me feel good.  Maybe that  means my clothing items look more boutique-like and less home-sewn than I thought ;)
So to begin with,  I either had to find some nice green jersey knit at my fabric store or some premade green tees in a nice color.  Strike out time!  My local fabric store is really heavy on the quilting, flannel and fleece products.  But as for nice apparel fabrics, talk about striking out regularly.  Its hardly even worth shopping there half the time. Of course, I didn't find any green knits that I likes.  At the clothing stores, it also wasn't exactly a breeze.  It seems like the green of choice this spring is an ugly yellowish olive color that I don't think would be super flattering on very many people.  Finally I found these basic green tees.  Perfect. 
 Except for these pockets.  I knew I definitely had to find a way to hide that pocket. 
So, after thinking about the design for a while, I decided to make a ruffle shirt similar to Sachiko's ruffle shirt 2.  So, I copied her instructions and cut out 2.5 inch diagonal strips from my extra shirt, then ruffled them. 

 I purposefully placed 2 shorter ruffles underneath the neckline to cover up that pocket.

Then I zig-zagged the ruffles downward, first sewing along the pathway created by the black line.  Then, I added a couple more ruffles on top along the blue line. 


The shirt still needed a finishing touch, so I added 3 fabric flowers with green buttons sewn in the middle along the neckline.

 I really like this shirt.  Its definitely one of my favorite embellished tees. So, Shelley, you are lucky that it doesn't fit me, cause otherwise, I might have been tempted to keep it instead of putting it in the mail yesterday.  As it is, I might just purchase another couple tees in my size, and we just might have to be twinsies!

Saturday, March 5, 2011

Friday Fashions #7, Watermelon Pink Tee

I decided to make another embellished tee this week.  
 I found these cute tees on clearance for $1 each while I was running through walmart this week.   I decided I wanted to try vertical ruffles similar to Sachiko's shirt on Tea Rose Home.  I made my strips thinner.  The larger strip was 1 inch and the smaller was 1/2 inch thick.  Then I pinned them down the length of my shirt.  Buzz Lightyear finished watching his afternoon movie (Toy Story 3, what else!) before I was finished pinning.  So, he decided he wanted to help me a little.
 He was so proud of himself!  
 As you can see, the strip he pinned is a little wonky.  I had to fix it while he wasn't watching ;)
 Here it is after I sewed on the vertical ruffles.  I loved most of it.  The outside and middle strips are the same length and the short ones are 5" shorter.  I altered the alignment of the pink variegation for interest. 
I didn't like the neckline. It just seemed a little unfinished. 
 So I made an additional strip that I pinned around the neckline.  One strip wasn't quite enough, so I made a short 5" strip for the other shoulder.  That way, the variegated pink color was symmetrical at the shoulders.  


I kept a little space between the 2 strips for fabric flowers.   Again, I got the idea from Sachiko here.  I made 3 sets of circle with 3 sizes each. 

 Then I folded the circle into quarters. 
And sewed over the tip.  Then I unfolded a little, and made another little bunchy seam. 
This is what they look like unfolded. 

Then I hand stitched them to my shirt.  I am done!

My shirt is complete and ready to wear!

LinkWithin

Related Posts Plugin for WordPress, Blogger...