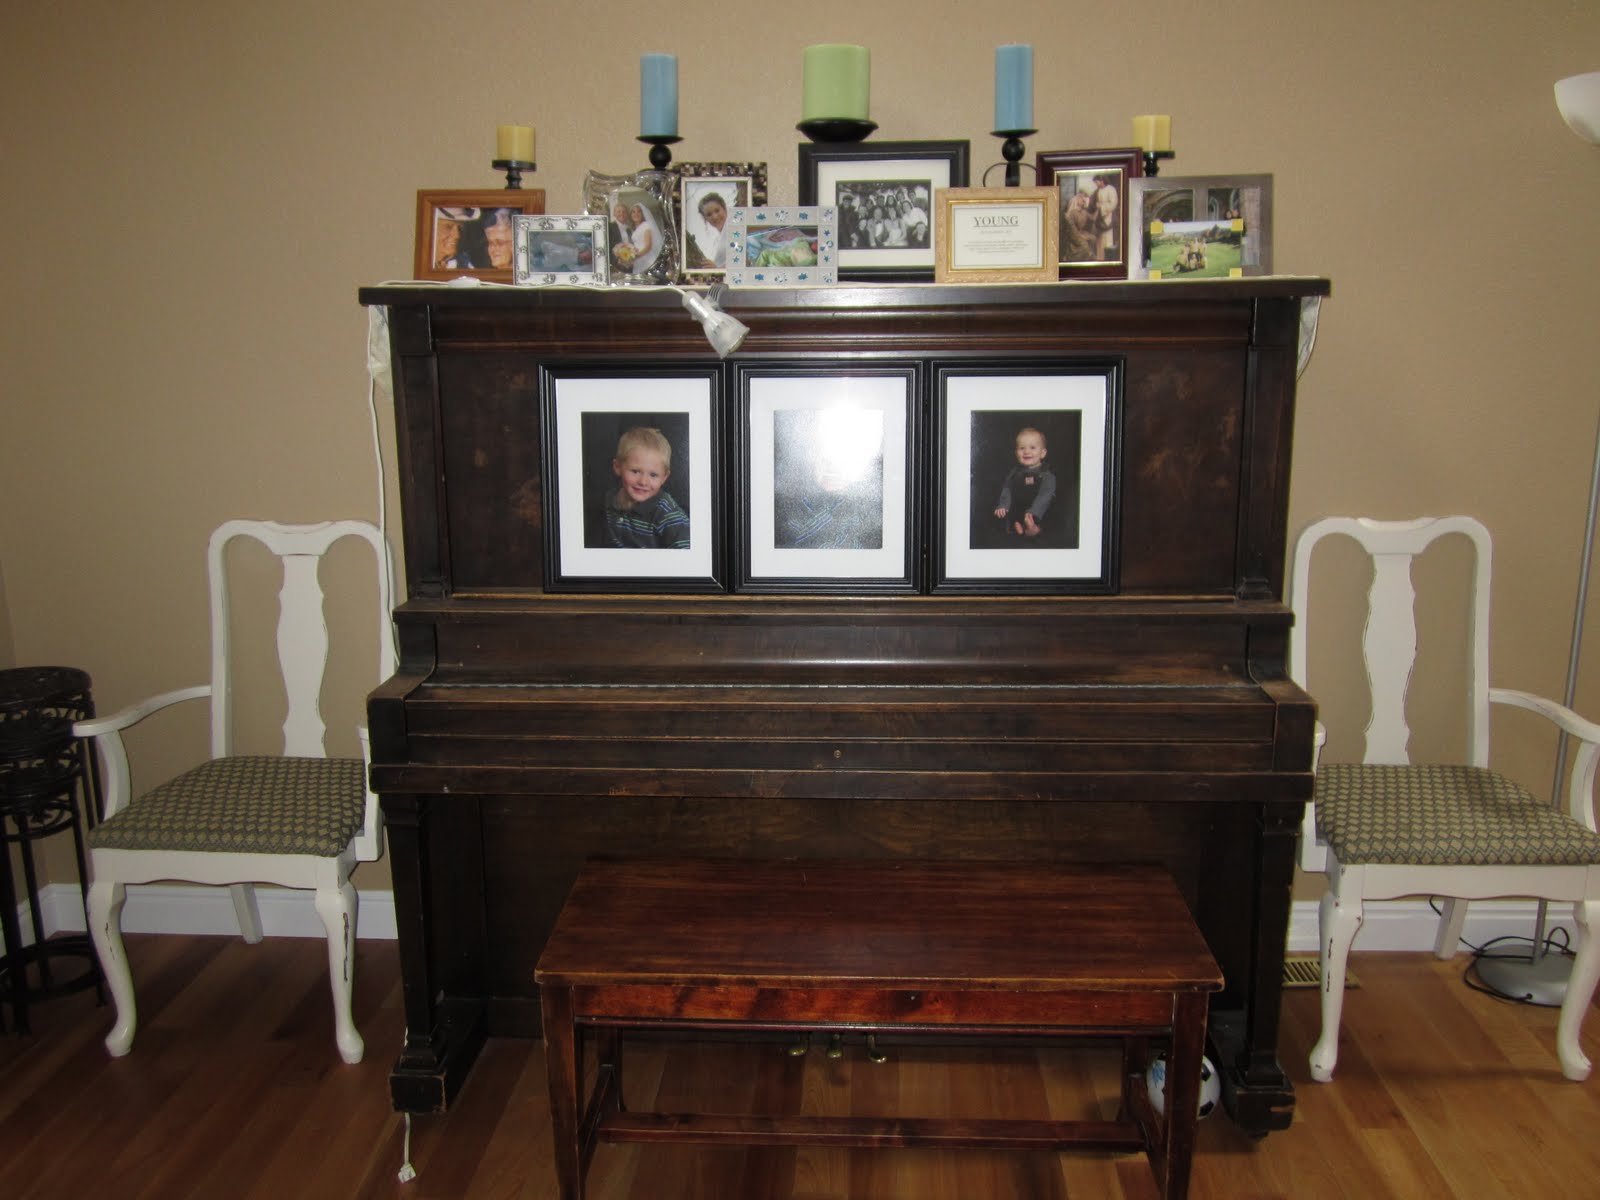
Since I recently found my old camera, I was able to find this picture.
This is what those chairs looked like when they were red. They weren't bad; they were just a little dingy and needed a facelift.
Now, after a fresh coat of paint and new fabric on the cushions, they look like completely new chairs.
I still love the way these chairs look flanking my piano. Added bonus, the one of the left is a new time-out spot for Anakin. I didn't really plan of using the chairs for actually sitting in very often. However, my piano is large and when a little person is sitting down, the piano blocks the view of the rest of the room. Its a perfect spot for a little boy to sit and think without distractions.
Tuesday, July 19, 2011
Wednesday, July 6, 2011
Friday Fashions #14, Jean Shorts
I don't know about you, but I have a ton of jeans that look just like this. Playing with the boys, I always wear holes in the knees. Then, I'm stuck with a bunch of worn out jeans. Usually they become painting pants, but a girl only needs so many junky pains of pants to wear while working on projects.

So, while I don't need any more project pants, I do need shorts for this summer. Therefore, I cut off the jeans right at the knees where I had the holes.
I serged the edges.
Then I ironed up the edges to form a cuff.
This was a super quick solution to my summer wardrobe deficiency.
I love my boys, they fill my heart with so much joy. I love it even more when they are getting along. Anakin is always trying to protect and help Mr. Bean. He is such a good big brother.
Thursday, June 30, 2011
Little Girl Embellished Tees
Remember the green embellished tee that I made my SIL for her birthday? Her daughter is having a birthday in the next week. A few weeks ago I was skyping with my 3 yr old niece and she asked if she could have a shirt just like her mommy's tee for her birthday, only in pink instead of green. Of course my heart melted at this request and I said yes. After all, it isn't everyday that I get a chance to make something for a little girl.
When I was shopping for pink tees, was surprised to see so many that had writing or pictures all over them. There weren't many options for plain pink. I found this one at target. I picked it because I liked the slightly puffed sleeves.
Then, I found a 2 pack of shirts that had a matching pink polka dot and a purple stripe. I decided to run with that option. I could add the pink polka dot fabric to the plain pink shirt and I would have the extra purple shirt to play with.
So, I cut this shirt into 1 in strips on the bias.
Using a basting stitch, I created gathers along the upper edge of each strip. Then I pinned these ruffles diagonally across the pink shirt. Super simple.
I got a little more creative when I started working on this purple and white stripe shirt. I had some extra purple knit from my organdy ribbon ruffle shirt that I thought I could use. However, when I pulled out those scraps the purples were too different, and they completely clashed.
I did love the look of the organdy ribbon ruffles though and I just happened to have yellow organdy ribbon. I have always liked the purple and yellow combo. Hopefully my niece does too!
I gathered the ribbon and then pinned the strips to the shirt. Next I sewed the ribbons into place. After that, I made 3 flowers out of the remaining ribbon with white button centers to sew onto the collar of the shirt.
Hopefully she likes the shirts as much as I like them!
Sunday, June 26, 2011
Family Reunion Tshirts
We just had our first family reunion a week ago. My parents celebrated their 30th wedding anniversary. We rented a beach house in Galveston, Texas for the week. We decided that we wanted to have tshirts made, and that became one of my projects. With the help of Mr. Right, I drew this cartoon with each member of our family. My little sister with her fiance are on the left, followed by my pregnant sister and her husband. Next are my parents. Then, its my little family with Mr. Right and 3 little monsters.
I used an online company called Zazzle to have the shirts printed.
With this company, there is a minimum order number of 12. There are just 11 in our family, so luckily my pregnant sister wanted 2 shirts, one to wear now and one to wear post pregnancy.
I love that we had tshirts made. It really was an easy process. I just had to upload my drawing and then used the company's program to finish the layout with the words.
.
Saturday, June 25, 2011
Facelift for Two Chairs
I snagged these two chairs from my SIL when she was getting rid of them a while ago. They've been sitting in my shed for months waiting for me to decide to work on them. They were painted a bright red and the seats were covered in a red check fabric. The fabric was old and needed to be replaced but the red was perfectly fine. However, I don't have any red in my house at all, so I decided to paint and reupholster the chairs. My before pics are sadly lost on my old camera, but here are the after photos. I spray painted the chairs cream then sanded the edges for a distressed look. I redid the seat cushions in a green and taupe fabric.
I'm quite pleased with the way these chairs look next to my piano. For the most part, with the chairs against the wall, they won't get a lot of use. But they will provide extra seating that's easy to pull into the area when we need it.
Monogram Wreath
I broke down and bought a new camera. My old one has been lost for 6 weeks now. I thought for sure that it would turn up, but I still haven't found it. During a recent family reunion, I just decided to bite the bullet and buy a new one since I really wanted to start taking pics again, and of course, start blogging again. It's kinda hard to write on a craft blog without a camera to take pics of the crafts.
Here, I just thought I would take a better photo of my wreath because the photo in my original post doesn't even come close to doing it justice.
Wednesday, May 18, 2011
Monogram Wreath
So, almost 18 months ago, I purchased this enormous wreath on clearance.
I wasn't sure exactly what I was going to do with it, but it was such a great price and I have an abundance of large wall spaces, so I knew I could find a great place to put it...eventually. I finally got around to working on it. While it was sitting in my workshed, I would occasionally brainstorm about it. My general idea was adding a mongram. I thought it would be neat to add a "Y" but I didn't want a plain jane "Y" that can be purchased. I wanted my own design. So, once I got my saw this past Christmas, this project jumped up on my never ending, always expanding project to-do list.
Yeah, it jumped up on the list, but I still didn't work on it. I just didn't really want to mod podge paper like I usually do to wooden letters. I wanted something that would mesh a little better with plants.
Well, one day while blog surfing, I stumbled across this fantastic letter covered in moss. This was my solution. I would get my monogram and it would look great next to greenery! So I quickly cut out a "Y" I could be happy with. Its 20 inches tall.
Then, I spent a couple hours arrranging and rearranging various stems, leaves, green flowers, etc, until I was happy with their placement on the wreath.
With help from Mr. Right, we got the wreath hung that night. I love having it on this wall going up the stairs. I get to enjoy looking at this everytime I go up or down. And it really draws the eyes upward when looking at it from the mainfloor.
Ohhhh. So pretty. (I KNOW this pic doesn't do it justice. I've lost my camera somehow and I'm stuck with taking pics on my phone!)
Subscribe to:
Posts (Atom)