Thursday, September 22, 2011

Friday Fashions #21 Mickey Shirt

Guess where I am right now?
Photobucket
The Happiest Place on Earth.
That's right.  We are at Disneyland.
So, of course I had to make shirts for our vacation.  In fact, I made seven of them.  Matching shirts for my boys, my parents and Mr. Right and I.
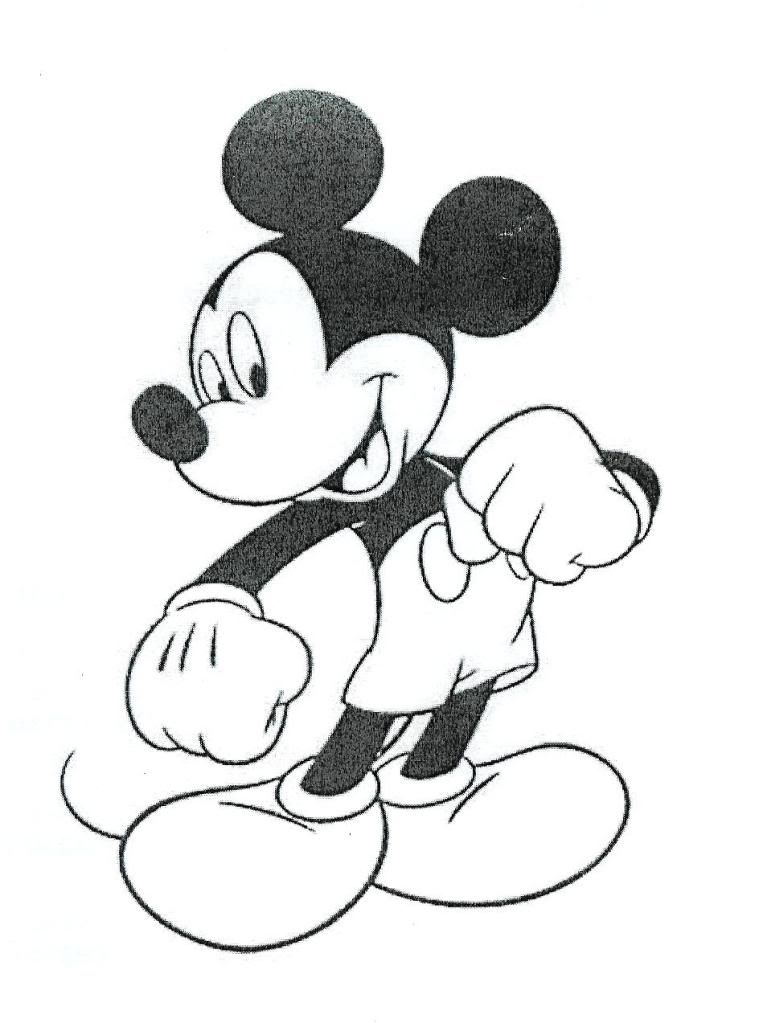
I purchased 7 red tshirts and a couple of bleach pens. Then, I searched for an online coloring page with Mickey Mouse.  There are hundreds to choose from.  I grabbed one I liked.
Photobucket
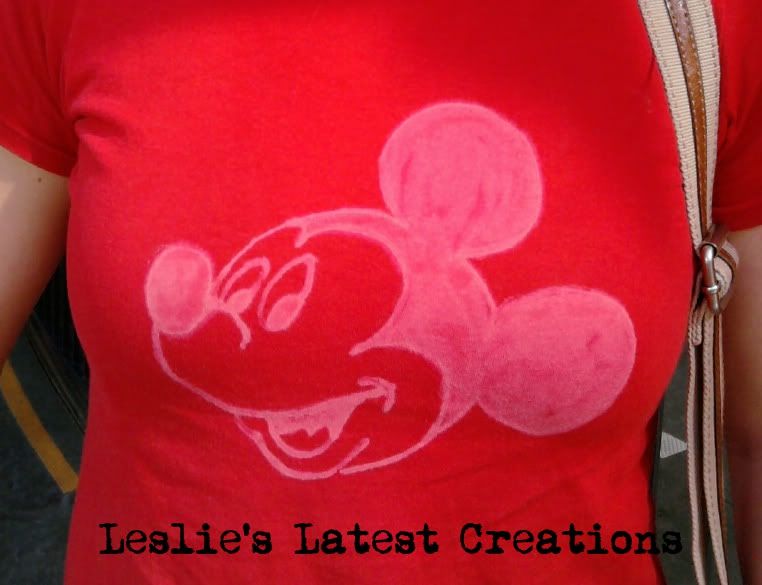
Then, I enlarged his head. With a fabric marker, I traced the outline onto each shirt.  I inserted a sheet of wax paper into each shirt, so that the layers weren't touching.  Then, I colored the shirts with the bleach pens.
Photobucket
 I let the bleach soak into each shirt for about 10 minutes before rinsing it off and washing the shirts in the washing machine.
Photobucket
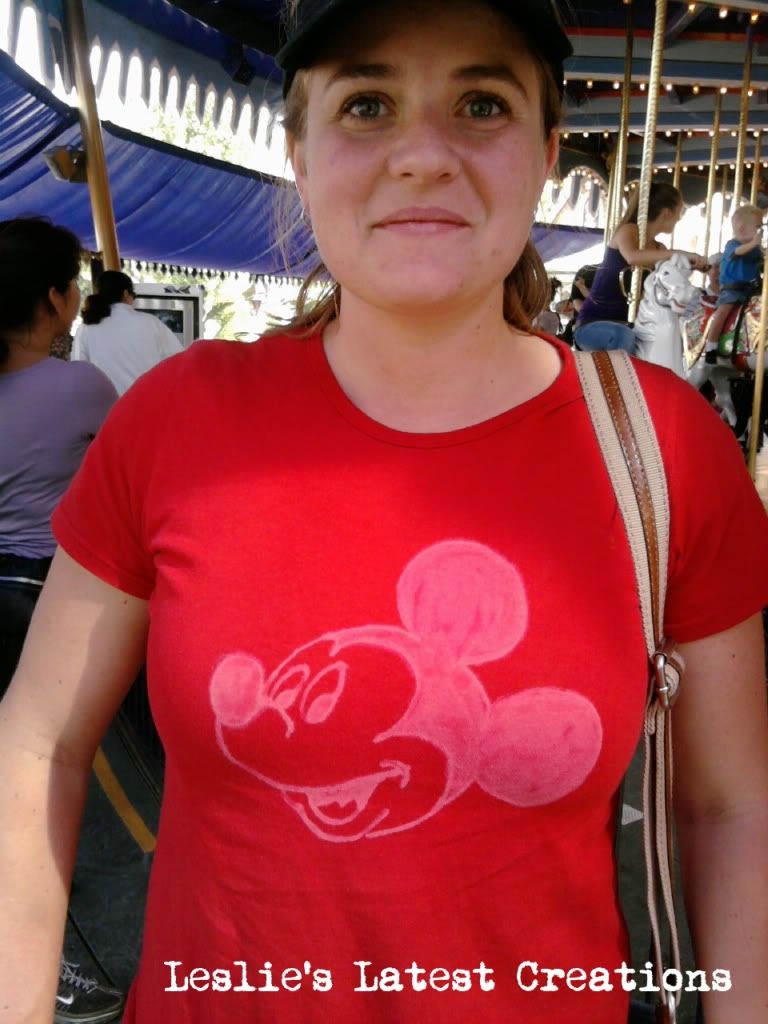
And there we have it.  Mickey Mouse Tees.   On some of the shirts,the bleach started bleeding through, so the lines are a bit fuzzy. So, I wouldn't make a super intricate picture if I were you.  Also, outlining is way easier and neater than trying to color something in.
I loved loved loved having matching bright red shirts for everyone.  It made it so easy to find one another in the crowds.  I am definitely planning on matching shirts for every day next time we come to the park.   This was a super fun and easy project.  I'm already planning on making the kids Darth Vader and Buzz Lightyear shirts. I love these Mickey Mouse shirts. This will be fun to wear and remember such a fun family vacation.
Photobucket

Photobucket

Photobucket

Photobucket

Photobucket

Sunday, September 18, 2011

Make a Fraying Rosette

Photobucket
I promised a tutorial on the rosettes I made for my Lime Sherbet Shirt, so here you go.  These really are extremely easy, fun and FAST.  Plus, it's a great way to use up fabric scraps. 

Photobucket
I love the messy, fraying look of these rosettes. 
To achieve that look, I didn't finish the edges of my fabric.  I grabbed some charcoal suiting scraps and cut 3 long strips (one for each flower) about 2 inches wide.  As you can see, my strip doesn't have a nice straight cut line, its uneven, and that's ok.  
Photobucket

I zigzagged the edges of the strip about 1/4 inch inside each edge to prevent the fabric from completely unraveling.  I want some fraying, but I also don't want the roses to fall apart too quickly and the zigzag stitch should keep the fabric from fraying past that line.  
Next, I set my stitch length to the longest setting and sewed down the length of my strip.  Then, pulling on one thread at one of the ends I was able to create a gather.  The more you pull, the more gathered the fabric becomes.
Photobucket

Next, fold the fabric in half lengthwise along the gathering seam.  Then, fold one end of the strip 1/2 inch. Continue to fold/roll the fabric, wrapping until you are happy with the size of the flower.
Photobucket
With a needle and thread, sew the roll together as you turn the fabric.
Photobucket

The back of the flower should look something like this   You could use a glue gun on the flowers instead of stitching them if they were going to be on something with minimal wear and tear.  Since I was making these for a shirt, I wanted to sew them together.   However, I made similar flowers for my HOPE letters a couple weeks ago (out of the same fabric scraps too!) that I glued together. 
Photobucket

 I sewed a pin onto the back of each rosette.  These can be purchased in the jewelry sections at Michaels, Joanns, Hobby Lobby , craft store of your choice.  They come in a large pack for just a few dollars.   I wanted pins on these flowers since I don't really want them going through the wash even though I sewed them rather than using the glue gun.
Photobucket
After sewing on the pins, I pinned them to my shirt. Simple as that.   Each flower only took me about 10 minutes.  I'm seriously thinking of grabbing my scraps stash when I sit down in front of the TV.  I could whip up a ton of these, and they would be fun to clip to headbands, purses, and scarves.
Photobucket

I will be linking up here  and here this week. 

Friday, September 16, 2011

Friday Fashions #20, Lime Sherbet Shirt

Photobucket
My Lime Sherbet Shirt!

Photobucket
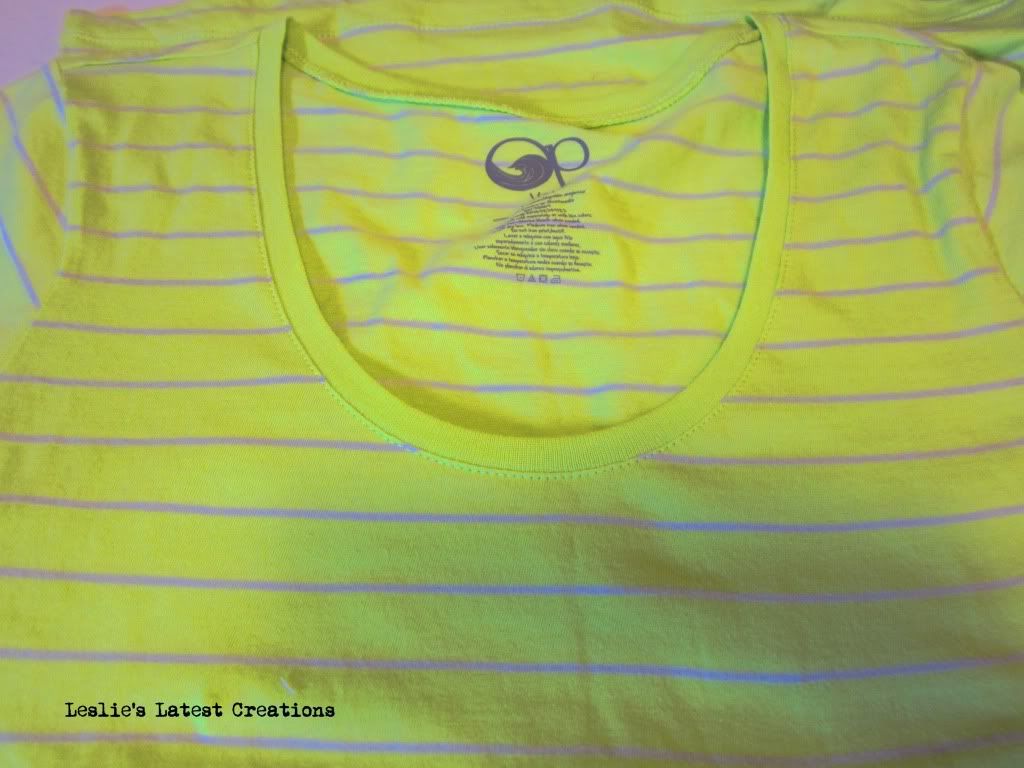
I found this shirt on clearance for today's project. I liked it just the way it was, but I thought that it could look even cuter with a little embellishing.  I really love all shades of green, even lime.  But this shirt was a little bright, even for me.  I felt like the lime totally overpowered the gray stripes.
To play up the gray stripes, I decided to add coordinating gray ruffles to my shirt.  I found these fabrics in my bin of scraps from previous projects.  I cut a few strips out, and started to play.
Photobucket
None of my scraps were knits, so I had to decide how I wanted to finish the edges. I decided to make some ruffles with fraying edges. I zigzagged the edges of the strips to keep the fabrics from completely unraveling, but still allow for some fraying.
Photobucket
Then, I made a long gathering stitch down the strips and ruffled the fabric. I placed the ruffles near the neckline.
Photobucket
I decided I needed another longer strip of the black/gray/lime cotton to go all the way around the neckline.
Photobucket
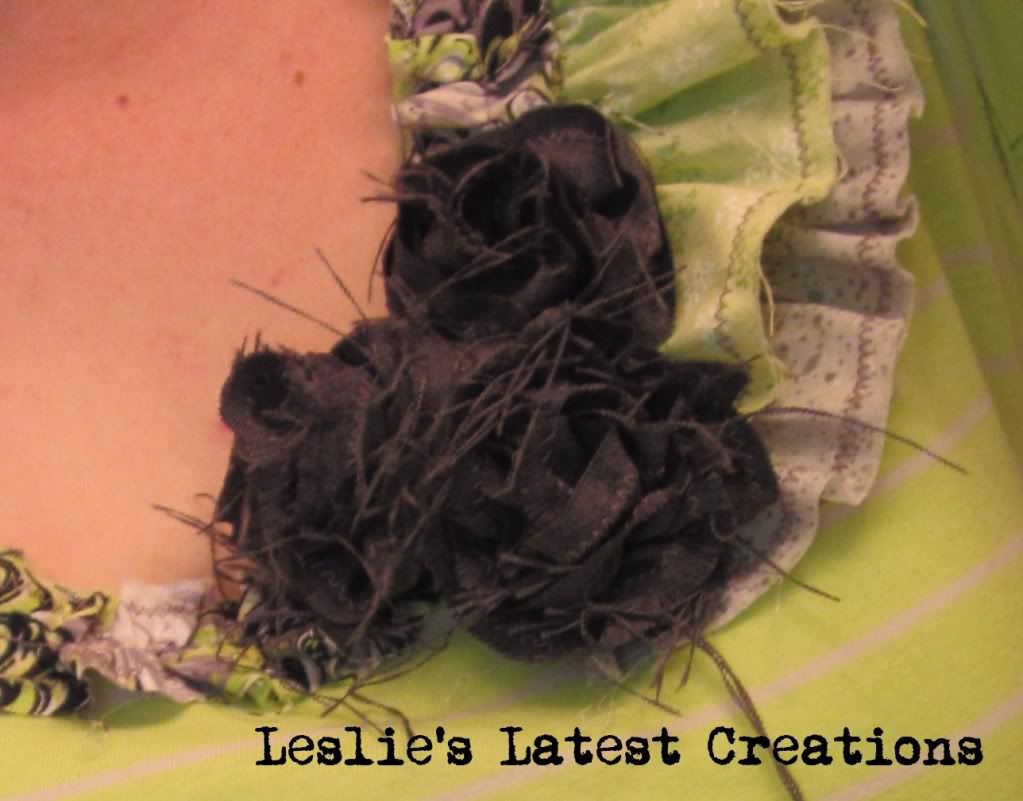
After sewing the ruffles in place, the shirt was cute, but it needed a finishing touch. I decided to add gray rosettes to the neckline at the point were the larger ruffles stop.
Photobucket
I made the gray rosettes out of leftover gray suiting fabric from some trousers I had sewn for Anakin.   I will be posting a separate tutorial on the flowers soon.
Photobucket
I sewed pins to the backs of the flowers so that they can be removed when I need to launder the shirt. I zigzagged the edges to protect from too much fraying, but I still didn't want to risk completely ruining the flowers in the wash.
Photobucket
I love the messiness and imperfection of the flowers.
Photobucket

And, my shirt is complete!
Photobucket
Photobucket

Photobucket
I feel just a little silly trying to have a photoshoot of myself in the mirror!
Photobucket

Photobucket

These are the Linky Parties I participate in.

Thursday, September 15, 2011

Not Your Ordinary Cucumber Sandwich

Last night I attended Recipe Club for the first time in months.  I wasn't able to make any of the summer get-togethers, and I really missed it.  It was so nice to go last night and eat yummy food and socialize.  Our theme for September was The Sandwich.  While web surfing, I came across an intriguing cucumber sandwich that had not just cucumbers, but tomatoes, pepperoncinis and avocado.  Simply stuffed with veggies. I decided to try it.  Doesn't this look delicious???
Here is the original recipe.  I decided to make a few changes based on my personal preferences. So, this is my version:

Ingredients

  • 1 loaf Wheat French Bread
  • Reduced Fat Chive and Onion cream cheese, softened
  • 2 cucumbers, peeled and sliced
  • Alfalfa sprouts
  • Light Balsamic Vinaigrette
  • 3 tomatos, sliced
  • Spinach
  • Pepperoncini, sliced
  • 1 avocado, mashed
  • Salt and Pepper

Directions

  1. Slice cucumbers and marinate with balsamic vinaigette.  
  2. Slice french bread in half lengthwise and toast in oven briefly. 
  3. Spread cream cheese onto the bread.
  4. Arrange cucumber slices in a single layer.
  5. Cover with sprouts.  
  6. Layer tomato slices, spinach, and pepperoncini. 
  7. Spread other slice of loaf with mashed avocado. Close sandwich and serve!

This is seriously a delicious sandwich. I'm not a vegetarian so I usually want meat in my sandwiches, but I honestly didn't miss it with this one.  There is enough crunch and texture with the sprouts and cucumbers along with a ton of flavor in the vinaigette, cream cheese and avocado.   Give this one a try.  

Wednesday, September 14, 2011

The Irene Tee

The Irene Tee

Last week I had another SIL have a birthday.  She didn't really want HOME or any other word I could make, but she does like the embellished tees I have sewn, so that's what I made for her.   She wears lots of black, with some white and gray mixed in, so I wasn't really surprised when she requested that her shirt be in those colors.  I, however, wasn't really in the mood to make an embellished tee with a black shirt and black ruffles.  The idea felt too boring, and I was afraid any cute ruffles would simply be lost in such a dark shirt. So, I decided to mix neutrals to add some color contrast and yet still keep things in my SIL's preferred color combo.   I purchased this gray tee to start. 
 Then, I took some black lace and cut and pinned strips in a circular "hurricane" pattern. Hence, the name for the shirt, the most memorable hurricane to date for 2011.
 After sewing on the lace,  I ruffled  1" wide strips of a gray, black and white camouflage print knit.   I wanted the colors in that knit more than the camo pattern, so a thin ruffle was perfect.   Next, I pinned the center of the ruffle to the top edge of the lace, creating a layered effect.
 This is what the shirt looked like after sewing the ruffles on to the top of the lace.  I was happy, but it still needed a finishing touch.  The "eyes" of the hurricanes were just a little plain.
 So, I sewed a small gathered flower out of the knit scraps and some black fabric for each "eye".

 And, the shirt is completed!

Tuesday, September 13, 2011

Burlap Signs

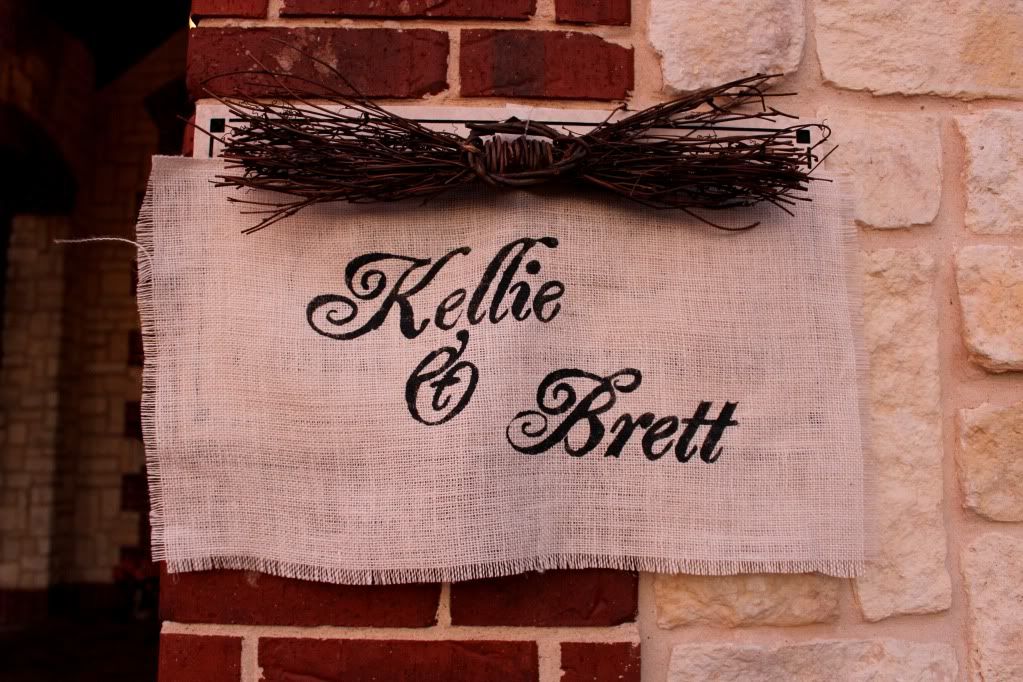
My sister's wedding reception was held in a local clubhouse. The setting was gorgeous, but there were a few unsightly plaques on the outside doors stating things like the clubhouse hours which didn't really set the right mood.  So, we wanted to cover them up. Kellie's theme was garden party, and we had burlap a plenty.  I used some of it to make signs to hang in front of the plaques.  
I think the signs ended up looking gorgeous.  I made 4 signs with freezer paper stencils, burlap and grapevine branches.  If you have a cutting machine, it would be super simple to make the stencils.  I don't, so I made them by hand by tracing the design onto the freezer paper and then cutting it out with scissors.   I stenciled "Kellie and Brett", "Together Forever" and a monogram that my sister created for the signs at the front door.  Then I attached a grapevine branch to the top and hung them in front of the plaque. 

Photobucket

Photobucket

Photobucket

My sister created a candy bar for the party favors, so I made a "Thank You" sign to hang above the candy.
Photobucket

These little signs added such a cute decorative touch.  Kellie plans of displaying the signs by framing them in funky colorful frames to put in her new home.

I've linked up to: Today's Creative Blog and House of Hepworths

Thursday, September 8, 2011

HOPE

Another SIL had a birthday, and she wanted the word HOPE.  I made these letters in a boxier, simpler font than my usual letters.  She also wanted a neutral color palette so that the she would be able to display this with any color scheme.  If you've read this blog for a while, you know that neutral is hard for me.  I tend to make selections with lots of color for myself.   To keep this word interesting and still honor my SIL's request for neutral letters, I had to find papers that were full of texture and/or pattern.   My starting point was the brick paper I used for H.  I love the urban vibe and the mix of browns and grays contained in one paper.  After finding that paper, I selected the other three to go with it.

 I added raffia and buttons to dress up the O.  The P is a textured brown paper with added brown glitter.
 Out of some fabric scraps I created rosettes with fraying edges to add to the E. 
Due to the very straight nature of the letters, the P kept falling over (a little top heavy).  So, I stained a board and Mr. Right helped me mount the letters to the board.
I wasn't sure if I was going to like this project when I was in the planning stages, but I have to say that I am pleased with the results and hopefully my SIL is too!

LinkWithin

Related Posts Plugin for WordPress, Blogger...