Thursday, January 12, 2012

Toy Story Aliens and Jedi Knights

Today, I'm just trying to check up on my posting.  I never got around to posting the kids Halloween costumes.  All three boys wanted to be the three aliens from ToyStory for Halloween.  That is, until the end of September when we went to Disneyland and they got to attend the "Jedi Academy" and wear jedi capes and fight Darth Vader.  Then, Anakin really wanted to be a jedi knight.  But, I'm kind of a nerd, and I really wanted my children dressed in a theme.  Two aliens and a jedi knight is just not as cool as three aliens from ToyStory.  So, I decided to amp up my stress level and sew each of the boys not only an alien costume but a jedi costume as well.   
Photobucket

Photobucket
In my very first initial brainstorming, I was just going to sew Anakin the jedi costume as well as the alien.  Because the alien has a head piece, he wouldn't have been allowed to wear it to school.
Without the 3 eyes and antenna on the headpiece; he would have looked slightly dorky and totally unrecognizable.   So, I decided that he would get a jedi costume too.  With the amount of Star Wars pretending that goes on around here, I knew it wouldn't go to waste.  Well, if Anakin was going to get a jedi costume, Buzz needed one too.  They are always playing Star Wars together.  When Mr. Right saw me cutting out the capes and realized what I was making for the big boys, he suggested that I make a 3rd cape for Mr. Bean as well.  Really, how could I leave the littlest terror out?  So, I ended up sewing 6 costumes: three aliens and three jedis.
The boys wore their matching alien costumes to our church party. Anakin wore his jedi costume to a Halloween party with a bunch of his school friends as well as to school.  Buzz and Mr. Bean wore the alien costumes to preschool.  Then, the boys all wore the jedi costumes trick or treating on Halloween night.  They had a great time and the costumes have been worn many times since Halloween. Well worth the time and effort!
So, how did I make the Alien costumes?
Photobucket
For the jumpsuits I used Butterick Pattern 6695.  Its a costume pattern with a jumpsuit with variations to create anything from a puppy dog to Santa Claus.  I knew that I could take the basic jumpsuit and add the alien elements to it.  I used a lightweight flannel.  Here in Colorado, we never know what the weather will be like, so this was flexible.  The kids could easily layer sweats underneath the flannel if needed, but if the night was mild, they would be fine with just the jumpsuit. I cut a 5in wide strip of royal blue felt to sew around the waist for the alien's belt.  For the collars, I used purple felt.   I created a freezer paper stencil to paint the planet.
Photobucket
For the head piece, I altered the pattern's existing tiger headpiece.  I simply drew ears that looked similar to the alien's ears and used that in leiu of the cat ears that came with the pattern.  I sewed a cone shape and then stuffed it before hand sewing it on as the antenna.  I used my machine for the eyes, just leaving a tiny opening on each that I could use to stuff, and then I hand sewed it shut.
Finally, I created spats to cover the kids shoes from Simplicity 9810, using the same blue felt as the belts.  The same pattern also had mittens that I modified to create the 3 finger hands of the aliens.  However, since the kids only wore their "hands" for about 2 minutes, I didn't even get a picture.
Photobucket

The jedi costumes were actually much faster for me to whip up.
Photobucket

Photobucket
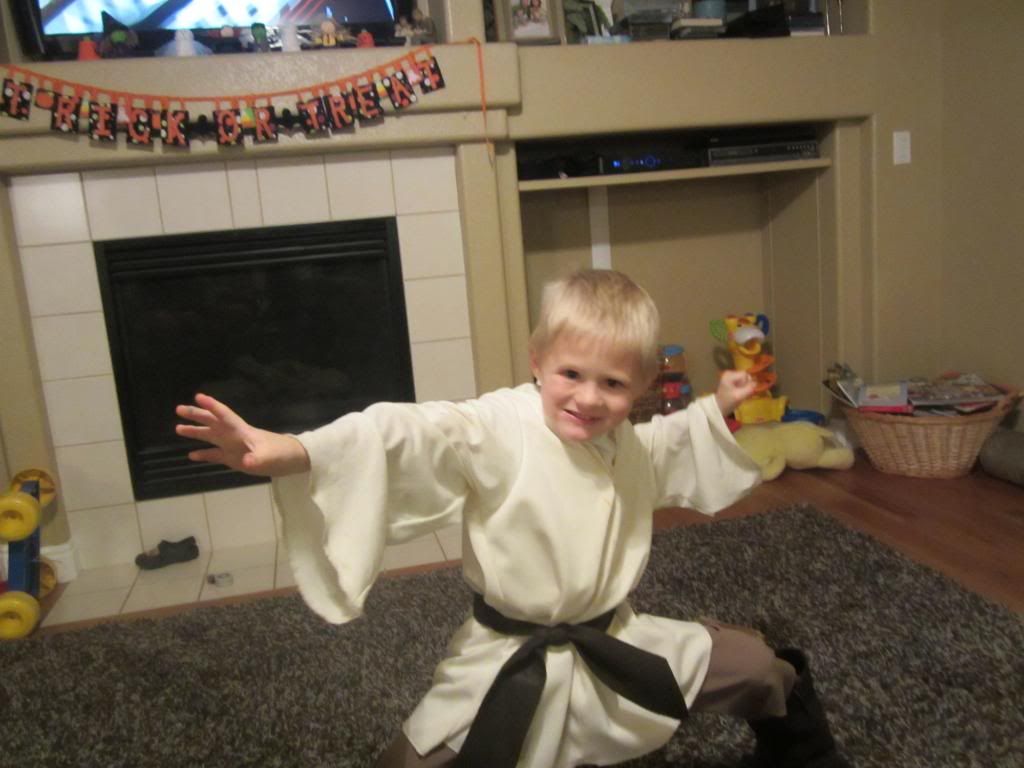
To create the boys' jedi costumes, I used 4 patterns.
Photobucket

Photobucket
For the tunic, I sewed McCalls pattern 3789.  I used a cream ponte double knit (think old lady knit pants fabric!)  Its the perfect type of fabric for kids wear and tear; its nice and thick and doesn't wrinkle :)
Photobucket
For the jedi pants, I used a pajama pants pattern (Simplicity 5974) purely for ease and speed.  This pattern is just one piece of fabric for each leg, so you just have an inner leg seam.  Super quick!  I used a polyester that won't wrinkle since costumes end up stuffed in the bin and not folded.  At least at my house. Lol!
Photobucket
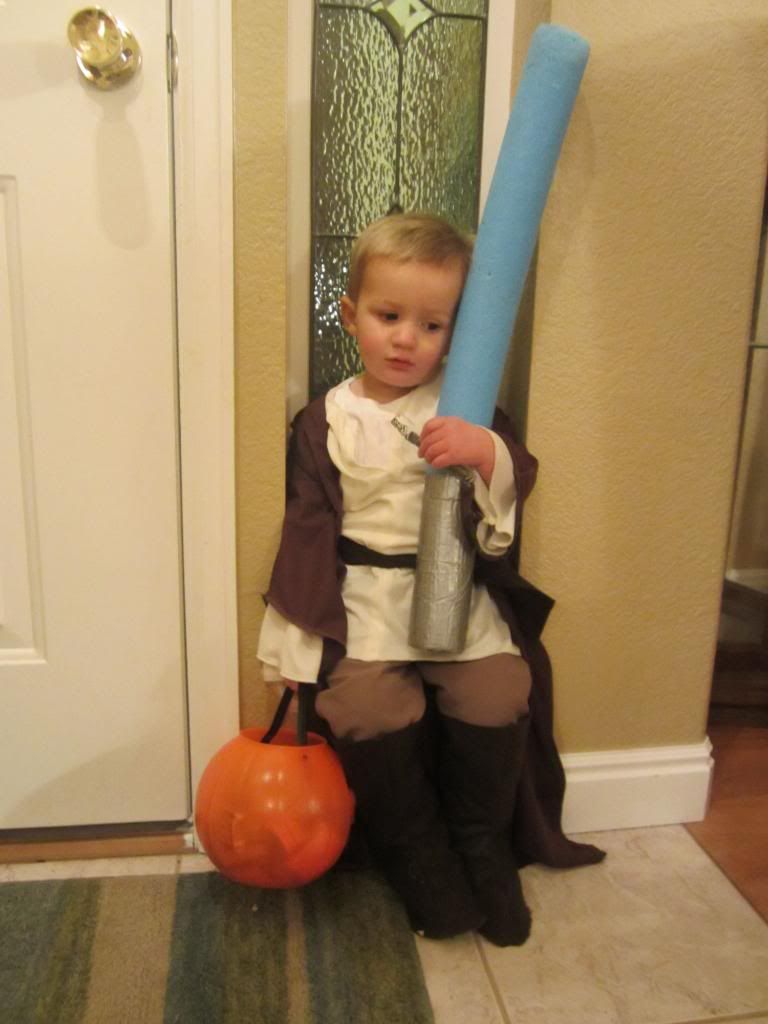
For their capes,  I used McCalls 5952.   I used a really lightweight knit that has a ton of spandex in it.  It ripples and flows beautifully which is just what a boy needs when he's fighting an evil Darth Vader- an awesome cape.
Photobucket


For the boots, I used the same spat patterns as I used for the alien shoes, Simplicity 9810.  This time however, I modified it slightly so that the boots would go up higher on the legs, just like the jedi boots.   I used brown felt.  I also made their belts from 3" strips of the brown felt.
Photobucket
And lastly, their light sabers are made out of pool noodles.  This isn't a new idea, but just in case you've never seen it before, I will elaborate.  I simply cut noodles in half, then wrap one end in duct tape to form the hilt.  They are perfect for little boys that like to wack each other.  When my boys pretend, they like to actually pretend they are fencing, and the plastic light sabers sold in the stores can really hurt!  This way, my boys can wack each other to their hearts' content without the hurts and the tears.

I will be linking up to these fabulous parties this week!

Sunday, January 8, 2012

My Blogging Hopes for 2012

I can't believe that we are already a week into January this year.  Time seriously flies.  Christmas was fun and exciting but very busy and tiring.  As a nurse, I don't get holidays off like others that work 9-5 jobs M-F.  Instead my schedule gets all mixed up and switched around so that there are nurses to cover all the holiday shifts.  A hospital just never stops running because people are always sick.  So, while I don't have to work Christmas every year (those years I work New Years) I still have to work other shifts around the actual holiday.  Those days this season didn't match up with my regular schedule,  so I ended the year feeling rather exhausted.  I spent the first few days this year cleaning up the holiday decorations and scrubbing the house clean, and then I just had to take a couple personal days on Wednesday and Thursday.  I got the kids fed, dressed and off to school, and then I did nothing other than read books.  It was completely revitalizing!  By Thursday afternoon, I was ready to get back to blogging and projects, but it was time to go back to my paying job :)  So, here I am now, on a Sunday night, ready to write down my hopes and dreams for this blog for the year 2012.

I've been blogging for a few years now, but very casually.  I started my family blog in 2008.  I started this blog in 2010 but I only had 25 entries that year and no followers.  Last year, I wanted to increase my posting frequency and grow the blog.  I posted more last year, participated with linky parties and gained a few followers, so my blog did get a little better last year.
This year, I hope my blog grows even more!  As I reviewed my blogging from last year, a few things are evident to me that I can improve to make this blog better than ever.
First, I lack consistency.  The few followers that I have really don't have a clue as to when I will post anything!  That has to change if I really want this blog to become a success.  My favorite blogs to read are the ones that post consistently.  Some of them post every day, some post 2-3 times a week.  But, they are each consistent.  I know there aren't going to be random gaps in posting that last for 2-3 weeks.  I know that if I check in every few days, I will have a new article to read.  I need to be that consistent with this blog.  I have struggled with this for a couple of reasons.  One, I am not really ahead on my posting.  I finish a project and try to post right away.  I don't have posts written ahead of time.  So, when my life gets a little busy, like during Christmas time, I let blogging take the back burner, hence no posts.
Also, I tend to only want to post a finished project or a perfectly staged reveal or awesome tutorial.  However, those types of posts take an enormous amount of time.  Time dedicated to crafting and blogging is a huge luxury for me.  Between taking care of my 3 young boys and our home, I also work 24 hours a week at the hospital.   So, I physically can't make every single post that awesome!  There aren't enough hours in a day.  But, I've learned from reading so many other successful blogs that each and every post doesn't have to have a fabulous completed project.  As I've gotten to "know" the other bloggers, I enjoy reading about the little things-the thrifted chair they can't wait to recover, or how they organized their pantry... So, I am giving myself permission to write posts that include a little bit more about me and include half finished projects, ideas, inspiration, yadiyadiyada...
Even giving myself a little more leeway on what I write, I am still creating a schedule for myself.  I want to post a minimum of 3 times a week.  Last year I tried to have a weekly "Friday Fashion" post on which I sewed something for myself every Friday.  In theory, it was a great idea.  But I burned myself out trying to churn out a completed sewing project dedicated to me every week while also getting other crafts done.  So, this year, I've created a schedule so that I am creating at least one guaranteed type of post every week.  However, I am only posting a Fashion Friday post on the 4th Friday of the month.  The other 3 weeks, will have different themes.  I think this schedule will work a little better for me.
And as far as a schedule goes, I am going to be more strict with myself and a schedule.  I can spend a little time around lunch most days reading emails, reading blogs, participating in linky parties, browsing pinterest, etc.  However, I am not going to get onto the computer each day before then.  Its too easy for me to spend way to much time surfing around.   In the mornings, I will workout, complete my household cleaning chore for the day, and run any errands.  Then, I can relax at lunch time.  Then during nap/quiet time I will work on projects.  After school I will be devoting to playing with my kids until bedtime. Then, in the evenings I can write.   This of course is just a rough outline of a schedule, and it probably will only happen 1 day in 5, but I can try, right?
I've realized that the blogs I enjoy reading the most focus on home design, decorating and refinishing furniture.  This year I want to spend more time on my blog posting about our home and the projects that I am working on.  I will still post about sewing, crafts and recipes.  However, I will definitely be increasing the number of posts I write about our home projects.  Hopefully, because I will actually be getting so many of the projects done that are on my list...
My photography also needs work.  I'm typically rushing to post a project and rush the photography.  My pictures just don't do my projects justice.  I have a basic point and shoot but that doesn't mean that I can't make fantastic pictures.  I plan on learning more about photography so that I can take the best possible pictures with my camera.
I think that these changes will really help push this blog along.  I really enjoy the time I spend blogging, and I plan to continue to enjoy it.  I hope you will too as I strive to make this blog better than ever.  

Monday, December 12, 2011

Ruffle Christmas Trees

Photobucket
One of my ward's RS Fabulous Friday crafts this year were these Ruffled Christmas Trees.  I made them back in October, but I didn't feel like posting about a Christmas craft when i was still in the midst of creating Thanksgiving stuff.
Theses were super easy to make.  We had the option of using taupe ticking that the instructor would purchase and ruffle for us, or we could bring our own fabric.  I naturally picked my own fabric.  I love the bright greens and reds.
The trees are made with styrofoam cones glued to wooden candlesticks that I painted cream.  Then you attach the ruffles. Most people hotglued their ruffles.   However, I decided to use small push pins.  I thought it might be easier and I wouldn't accidentally melt my styrofoam cone.  I was done in a snap!
I love these little whimsical trees.

Sunday, December 11, 2011

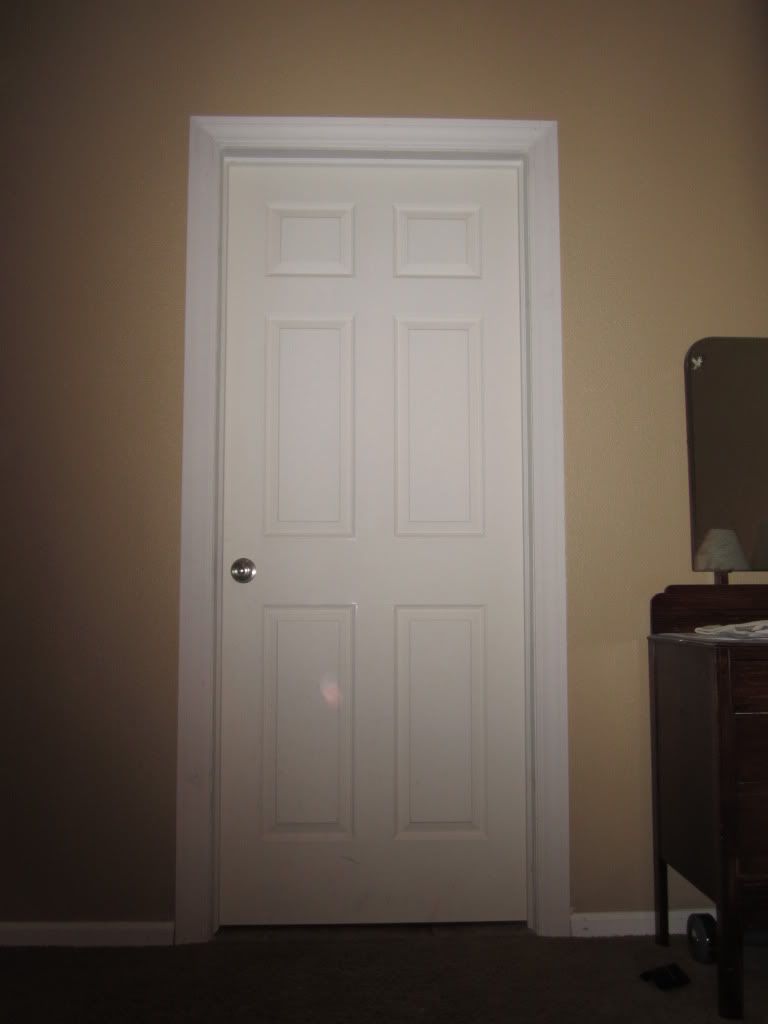
I've got a DOOR!

I always think its a little goofy to build a master suite without a door going into the bathroom.
Photobucket
In our house, the master bath didn't have a door, and it drove me nuts!  If Mr. Right was getting ready for work before I got up, the light and the noise would inevitably wake me up.  Grrr!
So, we decided to install a door going into our bathroom.  I'm getting ready to fully redecorate our master bedroom, so this was the perfect time to add the door.
Photobucket

Photobucket

Photobucket
I think Mr. Right did a fastastic job! Thanks honey!
It is so nice to be able to shut the door and have a little privacy!  I still need to paint the door and the trim, but I am waiting until I am ready to paint the whole room.   I want to add some woodwork and trim to the walls, so I will paint everything then.
On a less glamourous note but just as exciting to me, Mr. Right also replaced the hinges and the door knobs to the closet and water closet doors.  They were the dated shiny brass. Now, they are a beautiful brushed nickel.
Photobucket
We plan to gradually make our way through the house replacing the brass fixtures.

Friday, December 9, 2011

Gingerbread

I know it has been a while.  Blogging has a way of sucking me in and I start to feel totally obsessed with posting and linking, and reading everyone elses posts.  I think maybe I have a problem with time management? :)
So, in an attempt to really focus on the kiddos and sewing projects (the kiddos Halloween costumes), I put posting on the back burner for a few days the end of October.  Well, after a few days, the amount of posting I needed to accomplish built up to a slightly overwhelming time amount, so I continued to put it off. (I just didn't have 2 hours to spare that week!) And put it off, and put it off.  And really, all I have done is just postpone a task that will continue to become larger and larger.  I now have 6+ weeks of projects to write up.  So instead of 2 HOURS, I'm looking at a solid 2 DAYS of photo editing and writing to catch.  But who can spend that much time on a blog during December?  I can't.  I have too many Christmas projects to work on. Plus, with many of my completed, postless projects revolving around Halloween or Thanksgiving, I'm not feeling super enthusiastic at the moment.  I am completely in Christmas mode right now.  Maybe if I tackle one post a day I can get caught up?  Maybe...  But, I am going to post what I am working on now first.  On days that I have nothing, I can tackle items on my backlog.  Maybe...
In December 2010, I decided that I wanted to decorate my kitchen for Christmas with a gingerbread theme.  I really love to eat all things gingerbread/gingerspice/gingersnap and the season just wouldn't be the same without them. So, a gingerbread kitchen is perfect for me.  My mom happily passed down her old gingerbread decorations.  I love them!  And, I will slowly add to the collection so that I can fill every little nook and cranny! 
Photobucket
I keep a slim tree tucked into the corner of the breakfast nook. 
Photobucket
Last year, I fixed some of her ornaments to match my more obnoxious Christmas color scheme of lime green and bright red.   I love the way it looks.  I wouldn't change a thing...
Photobucket
except to add a tree skirt.  I have a brilliant idea, now I just need time.  I may or may not get to it this year.
My kitchen is triangular shaped, and I have cabinets on all three walls.  They are the short cabinets, so I am left with space above them before hitting the ceiling.   This is a perfect place for me to stuff decorations, thus leaving my countertops cleaner. I don't have quite enough gingerbread stuff to fill all 3 of the spaces right now, so I will gradually add gingerbread pieces every year until I do. 
Photobucket
The first wall you face as you enter from the dining room,  and thus can be seen from our front door. 
Photobucket
The second wall is to the left, and you face it as you enter the kitchen from the family room, but you can also see it when you are looking at the first wall. 
Photobucket
The third wall can only be seen when you are in the kitchen facing the fridge. 
Photobucket
Consequently, the first 2 walls have decorations at the moment and the 3rd has had nothing (finish the places that are most easily seen first!)
Above the cabinets on this first wall, I put our gingerbread train. 
Photobucket
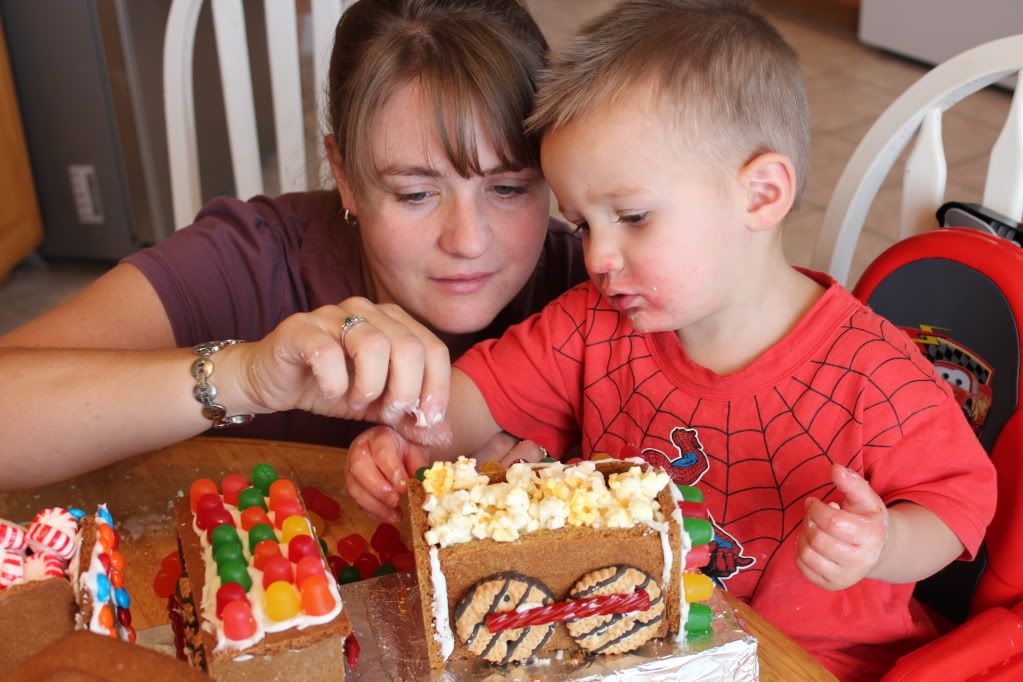
We made a gingerbread train last year, and the kids had so much fun!  So, we decided to make another one this year.  I made an engine, caboose and 3 cars (something for everyone in the family!)   The train might not be perfect; it might look as if a kid frosted it (he did!) but maybe that is part of the charm.  I really had to put my Type A personality away and let the kids go to town.  They had a great time, and really that is all that matters.
Photobucket

Photobucket

Photobucket
The "before" display on wall #2 holds all of my permanent gingerbread decorations, thus leaving nothing for wall #3. However, what if I add these darling letters?
Photobucket
These are just some more of my wooden letters that I cut out with my scroll saw, stained and modpodged fun papers. 
Photobucket

Photobucket

Photobucket

Photobucket

Photobucket

Photobucket

Photobucket

Photobucket

Photobucket
For the gingerbread letters, I used snow tex to create the look of frosting.  I piped it onto the letters just like I would have piped real frosting onto a gingerbread man.
Photobucket
 I found candy ornaments at Hobby Lobby and the Dollar Tree that I used for decorations.  I simply removed the ribbons and hooks and glued them on. I think that these figures look almost like real gingerbread creations. 
Photobucket
Now, with such a long word, I had to switch around my gingerbread displays.  I wanted Gingerbread to be on wall #2 since it can be seen so easily from both entrances into the kitchen. 
Photobucket

Photobucket
So, all of the things that were on wall #2 are now displayed on wall #3!
Photobucket
I'm happy to say my kitchen feels decidedly more decorated for Christmas now!

I will be linking up to these parties as well as to a Gingerbread Party at Cozy Home Scene!

Monday, October 24, 2011

Toddler Tees

One of my nieces recently had her first bday.  I couldn't resist making her a couple of embellished shirts.

Photobucket
I purchased 2 of these light purplr shirts, and then proceeded to cut one of them into strips.  I ruffled the strips, then sewed them on.  I used the same design here as I did for my Watermelon Pink Tee.
Photobucket

Photobucket
I think it's cute and if I were a 1 year old, I would wear it!
The second shirt is actually more like a light cardigan. 
Photobucket
I made a few little rosettes from some scrap yellow and gray knits.  I sewed them onto the left side.
Photobucket

Photobucket
I think this one is fun because its a grownup color scheme on a little toddler!
I think she looks cute.
Photobucket

I frequently participate in THESE parties.

LinkWithin

Related Posts Plugin for WordPress, Blogger...